Infinix X401, Race Lite Stock ROM Download: MTK Backup

Here is a stock ROM, MTK Backup for Infinix X401 which is also known as Infinix Race Lite.

With this Infinix X401 flash file, you can flash stock ROM back to your Infinix X401 using SP Flash Tool. This is mostly required when you have software issues with your Infinix android devices, and in most cases, flashing stock ROM on infinix android devices corrects all software errors if you know how to do it.

Below here is the download link for the stock ROM. You may also see the tutorial page on how to flash stock ROM on infinix and other MTK android devices below.

Infinix X401 Race Lite Stock ROM Download Details:

Version: Android 2.3.2 (Gingerbread)
ROM Size: 134mb
ROM Download Link: Download Infinix X401 Race Lite ROM Here
How to Flash Stock ROM on Infinix and other MTK Android Here

Source: Hovatek
Advertisement

Similar Tutorials


Infinix Smart Surf, X350 Stock ROM Download: MTK Backup

Here is a stock ROM, MTK Backup for Infinix X350 which is also known as Infinix Surf Smart.

With this Infinix X350 flash file, you can flash stock ROM back to your Infinix X350 using SP Flash Tool. This is mostly required when you have software issues with your Infinix android devices, and in most cases, flashing stock ROM on infinix android devices corrects all software errors if you know how to do it.

Below here is the download link for the stock ROM. You may also see the tutorial page on how to flash stock ROM on infinix and other MTK android devices below.

Infinix X350 Surf Smart Stock ROM Download Details:
Version: Android 2.3.2 (Gingerbread)
ROM Size: 96mb
ROM Download Link: Download Infinix X350 Surf Smart ROM Here
How to Flash Stock ROM on Infinix and other MTK Android Here

Source: Hovatek
Advertisement

Similar Tutorials


Fix-it-All. Fix All your Phone's Software Issues Here FREE

Splendid! I must say. 2015 is being a wonderful year for all of us at ArykTECH and for you, our fans, I trust, 2015 has being good, too!
At ArykTECH, we set certain goals for the year 2015 and we are able to achieve all our projections -this is all thanks to God for blessing ArykTECH with awesome fans like you! ArykTECH says thank you!

And to top it all, or, wrap it all should I say, ArykTECH is throwing a little PROMO at you! Can you catch it? Let's see.

FIX-IT-ALL Promo! For some of you, our fans that have being waiting to see our way of saying thank you, here it is.
We think FIX-IT-ALL Promo is a good way of saying thank you to our fans and of course, not only a goodbye wish for the year 2015 but also, a welcome gesture for the year 2016.

Within FIX-IT-ALL Promo period, ArykTECH attempts to fix all your phones software problems, be it iPhone, iPad, Tablets or any others completely FREE OF CHARGE!

How Does it Work?
It's simple! All you have to do is register your device here. Once your device is registered, an email would be sent to you immediately confirming your device registration and also detailing FIX-IT-ALL Promo schedules.

For How Long is this Promo Open?
FIX-IT-ALL Promo runs from January 1st through to 31st.

I Don't Know your Office, How Can I Locate it?
Your device registration confirmation email will contain the office address. Please, pay attention to the content of the email.

Not in Lagos? You Can Still Benefit!
If you are an ArykTECH fan outside Lagos, we give you cash instead. A sum of 2000 would be credited to your Neteller account. Learn more about Neteller here.

How Do I Participate Outside Lagos?
1. Simply ArykTECH on Twitter and share this page via Twitter using this tool:
2. Like ArykTECH on Facebook and share this page on your Facebook timeline using this tool:

NOTE: you should include the Hash tag #FIXITALL in your posts on Twitter or Facebook. This will help us track your participation.

Have More Questions? Hookup with ArykTECH on BBM Channel here: and Whatsapp here:

Once again, thank you for being honourable fans and customers!
T & C Applied!

Advertisement

You Might Also Like:


Infinix Buzz, X260 Stock ROM Download: MTK Backup

Here is a stock ROM, MTK Backup for Infinix X260 which is also known as Infinix Buzz.

With this Infinix X260 flash file, you can flash stock ROM back to your Infinix X260 using SP Flash Tool. This is mostly required when you have software issues with your Infinix android devices, and in most cases, flashing stock ROM on infinix android devices corrects all software errors if you know how to do it.

Below here is the download link for the stock ROM. You may also see the tutorial page on how to flash stock ROM on infinix and other MTK android devices below.

Infinix X260, Buzz Stock ROM Download Details:
Version: Android 2.3.2 (Gingerbread)
ROM Size: 136mb
Phone Configuration: Infinix X260, Buzz Spec and Configuration
ROM Download Link: Download Infinix X260 Buzz ROM Here
How to Flash Stock ROM on Infinix and other MTK Android Here

Source: Hovatek
Advertisement

Similar Tutorials


6 Top Reasons you Should Jailbreak your iPhone and iPad and How to

If you have once come across an iPhone or iPad of the same model as yours but very different at look and feel, you might want to ask the person what he does but before that, ask how to Jailbreak your iPhone or iPad first.
iOS Jailbreak

Jailbreak, in most cases, is very simple and only takes few minutes to do if you have the right Jailbreak tool for your device and your iOS version.
Wondering what JAILBREAK is? Yes. Jailbreak is the process of modifying your iOS systems by means of loading exploits that make it possible for you to write, re-write and even control your iOS system files thereby making it function (better) other than the way it is designed to function.

Jailbreak in iOS is similar to Rooting in android.

Having known what Jailbreak is, you might want to know why you should Jailbreak your iOS device. Here are 6 top reasons why you should Jailbreak your iPhone or iPad.

Top 6 Reasons to Jailbreak iPhone or iPad

1. Root Access: one of the killer-reasons why most iPhone and iPad users always wanting to Jailbreak their iPhone and iPad is the fact that you simply cannot access the root folders and files of an unjailbroken iPhone or iPad. Even when such iPhone or iPad (Unjailbroken) is connected to a PC, you can barely do much on it except that you synchronize your files using iTunes which isn't much friendly.

Jailbreaking your iPhone or iPad lets you have access to the root folders and files of the iPhone or iPad, even when such is connected to a PC.

2. Read-Write Possibilities: of course, gaining access to all the files and folders on your iPhone and iPad is not as good as being able to modify them the way you want!. With applications such as iFile, you can manage the files and folders on your iPhone and iPad.
You can rename, delete, copy,  duplicate, backup, transfer and do lots more from within the iPhone or iPad.

3. Theming and Customization: changing the behavior and appearance of your iPhone or iPad would be very easy when you jailbreak it. From changing the fonts, the background colour, pop ups to customizing the apps display are the least you can do when you  jailbreak your iPhone or iPad.

4. Tweaking and Cheats: if you are an iPhone or iPad user that loves downloading from many sites, jailbreak is definitely for you. With jailbreak, you can be able to download apps that will enable you reduce your data usage and consumption, download from many sites at once and even change your IP as you like plus more.

5. Flexibility: generally speaking, your iPhone and iPad becomes more flexible when it is Jailbroken.

6. Transparency: with Jailbreak, Apple no longer has anything to hide from you as you can flawlessly access and tune every aspect of your iPhone and iPad either from (within) the phone or via your PC.

Want to Jailbreak your iPhone or iPad now? Here are full list of Jailbreak Tools you can use to Jailbreak your iPad and iPhone.

Advertisement

Similar Tutorials


Infinix Surf X351 Stock ROM: Download Here

Infinix Surf X351 is an older Infinix android device though, it is still one of the commonest Infinix android devices common with Infinix android device users.

Here, you have a Stock-based ROM for the Infinix Surf X351. You might wonder why I am sharing a download link for the stock ROM rather than the custom ROM, well, that's because it is your only option in case your Infinix surf X351 got bricked in the cause of customizing, tweaking or that it just happened ordinarily.

Infinix Surf X351 Stock ROM Download Details:
Version: Android 2.3.2 (Gingerbread)
ROM Size: 239mb
ROM Download Link: Download Infinix Surf X351 ROM Here
How to Flash Stock ROM on Infinix and other MTK Android Here

Source: Hovatek
Advertisement

Similar Tutorials


Download CM13 for HTC One M9: Android 6.0 Marshmallow

Although, HTC One M9 is in the list of HTC Phones that will receive the official android 6.0 Marshmallow. But, if you have grown tired of the official HTC ROM, here is a perfectly working CM13 for your HTC One M9.

This ROM is a fully functional android 6.0 Marshmallow for the HTC One M9. With this, you don't have root your HTC One M9 again as root access is built with this ROM. You can enable the root access from the Developer Options.

Contrary to the time and call (on AT&T M9) bugs reported on earlier build of CM13 for the HTC One M9, the recent nightly version has corrected those bugs giving a much smoother and faster experience of CyanogenMOD 13 on your HTC One M9.

How to Install Official CM13, Android 6.0 Marshmallow On HTC One M9


1. Download the latest CM13, Android 6.0 Marshmallow for your HTC One M9 from here. And download the CM13, Android 6.0 GApps from here.

2. Copy both files you downloaded above to the root of your SD Card/internal storage.

3. Reboot the phone to recovery.
NOTE:
- You should have custom recovery flashed on your HTC One M9. Either TWRP, ClockworkMOD or Philz Custom Recovery is OK. See here: How to Flash Custom Recovery on HTC Android

4. From the recovery, Wipe Data/Factory Reset the phone. This action normally wipes data, cache and delvik cache of the phone.

5. Flash the CM13 on your HTC One M9 by selecting "INSTALL" from the recovery then, navigate to the location where the downloaded ROM is placed on the phone. Immediately flash the GApps following the same procedure.

6. Wipe/Factory Reset the phone again and then, reboot.
The first boot usually takes longer time, about 10 minutes. Allow the ROM to initialize and start all the apps properly and enjoy!.

Advertisement

Similar Tutorials


CM13 for Samsung Galaxy S6: Android 6.0.1 Marshmallow

Just few days ago, CM13, android 6.0 Marshmallow arrived for the Samsung Galaxy S6. Contrary to the previous AOSP version that's made available for the phone, the CM13 is much more stable with only few things off the line.

So, if you have grown tired of the stock experience on your Samsung Galaxy S6, now you can flash a beta build of CyannogenMod 13. This build is from an XDA senior member ‘sktjdgns118’ and it is the first public CM13 build for the Galaxy S6 which is based on Android 6.0.1 Marshmallow.

What's Working in the ROM: CM 13 for SAMSUNG GALAXY S6


  • Basic 2D graphics
  • WiFi and Hotspot
  • Audio and microphone
  • SMS, MMS
  • Mobile data (RIL, 3G, LTE)
  • GPS, NFC, MTP and other connectivity


What's Not Working in the ROM
Camera, Sensors and everything else are reported as unstable, buggy and or not working at all.

This CM13 is available for which Samsung Galaxy S6 Variants?

Galaxy S6 International (SM-G920F/I, zerofltexx)
Galaxy S6 SK (SM-G920S, zeroflteskt)
Galaxy S6 KT (SM-G920K, zerofltektt)

Above is the list of Samsung Galaxy S6 Variants compatible with this ROM.

If you own any of the models mentioned above, then you can continue with the guide below to flash the ROM on your Samsung Galaxy S6.

HOW TO INSTALL CyanogenMod 13, ANDROID 6.0.1 ROM on SAMSUNG GALAXY S6


1. Download the CyanogenMod 13 ROM for the Samsung Galaxy S6 here and move it to the internal storage of the phone.
NOTE:
- You should move the downloaded ROM to the ROOT folder of the storage.
- Google Gapps are not working at the moment with the ROM.

2. Turn the phone off and boot into TWRP or Philz (power + home + volume up). See here: How to Flash Custom Recovery (TWRP) On Samsung Galaxy S6

3. While in recovery, wipe, factory reset the phone. This normally wipes data and cache (optionally, delvic cache).

4. Then go to ‘Install’ and navigate to the folder where the ROM is located and flash it.

5. Reboot your phone. The first boot may take longer than usual and that should be about 10 minutes.
Once the first initialization is complete, your Samsung Galaxy S6 will boot into CM13.

Advertisement

Similar Tutorials


Jailbreak Tools for iPhone, iPad and iPod Touch

There are many tools available on the internet that can be used to jailbreak your iPhone, iPad or iPod touch in just a few steps. Below you can find the download links to some of the most popular Jailbreak tools available that are capable of jailbreaking most versions of iOS.

Each with its flexibility and methods, the end result is the same. You can Jailbreak your iPhone, iPad or iPod touch provided that you have used the right tool for your version of iOS.

We will update this page with detailed guides for all of these tools as we proceed.

iOS 9 Jailbreak Tools:
Pangu9 Jailbreak Tool: Download Pangu for Windows here | For Mac Here
Taig for iOS 9 Jailbreak Tool: Download Taig for Windows here | For Mac Here
PP Assistant iOS 9 Jailbreak Tool: Download for Windows Here | For Mac Here

iOS 8 Jailbreak Tools:
Pangu8 for iOS 8 Jailbreak: Download Pangu8 for Windows Here | For Mac Here

iOS 7 Jailbreak Tools:
Evasi0n7 (1.0.3) for iOS 7 Jailbreak: Download Evasi0n7 for Windows Here | For Mac Here
Evasi0n7 (1.0.2) for iOS 7 Jailbreak: Download Evasi0n7 for Windows Here | For Mac Here
Evasi0n7 (1.0.1) for iOS 7 Jailbreak: Download Evasi0n7 for Windows Here | For Mac Here

Download P0sixspwn Jailbreak Tool for Windows Here | For Mac Here

iOS 6 Jailbreak Tool:
Redsn0w Jailbreak Tool for iOS 6 downward. Download Redsn0w for Windows Here | For Mac Here
Download Sn0wbreez v2.9.14 here

Older version of Evasi0n Jailbreak Tool Here:
Evasi0n 1.5.3 for WindowsEvasi0n 1.5.3 for MacEvasi0n 1.5.3 for Linux

Apple TV Tool:
Season Pass for Apple TV: Windows Versions Here and Mac Version Here

Advertisement

Similar Tutorials


Samsung Galaxy S3 Android 6.0, CM13 Custom ROM Download

Samsung Galaxy S3 receives android 6.0 Marshmallow -thanks to Android Open Source Project. The second custom ROM based on Android 6.0 Marshmallow for the Samsung Galaxy S3 has also made its way to the developments floor.

This second ROM is CyanogenMod 13, which has a lot more features and it is more stable for this low-end-phone for which you might doubt android 6.0, Marshmallow would ever be available. The CyanogenMod 13 is based on the latest CM sources and features Android 6.0.1 Marshmallow on board, which is an update over the for Android 6.0 version.

What's Working in the ROM, CM13 for Galaxy S3:


  • Basic 2D graphics
  • WiFi and Hotspot
  • Audio and microphone
  • SMS, MMS
  • Mobile data (RIL, 3G, LTE)
  • GPS, NFC, MTP and other connectivity


What's Not Working or Buggy:

non-FAT32 SD cards
WiFi P2P.

HOW TO INSTALL CM13, ANDROID 6.0 ON SAMSUNG GALAXY S3

1. Download both required files, the CyanogenMod 13 Android 6.0.1 Marshmallow ROM and Marshmallow Gapps for the Samsung Galaxy S3. Move both files to the internal storage of your Samsung Galaxy S3.

2. Turn your Galaxy S3 off and boot into recovery mode.
NOTE:
You should have custom recovery flashed already. See here: How to Flash Custom Recovery On Samsung Android Devices.
How to Boot Samsung Android to RecoveryPress and hold the volume up, home and power keys at the same time.
3. Once in recovery, make a full Nandroid backup.
The is a must in case you ever wish to go back to your previous ROM.

4. Wipe data, cache and delvik cache.

5. Flash CM13 ROM and then flash Marshmallow Gapps.
To flash the ROM, select Install and then, navigate to the folder where the ROM is located. The same process goes for the GApps.

Reboot your phone and enjoy Android 6.0.1 on your Samsung Galaxy S3.

Credit: forkbomb444
Advertisement

Similar Tutorials


How to Root Android 6.0, 6.0.1 Marshmallow

Rooting android 6.0 Marshmallow is just the same as rooting android 5.0 Lollipop. Since one-click root is not available for these android versions yet, the most suitable, risk-free and easy method to obtain root-access is to flash SU Script from recovery on your phone.

Here, I discuss how to root android 6.0 and 6.0.1 Marshmallow by flashing SU Script onto the phone from recovery.

Android 6.0.1 is available and already running on a select number of Android devices. It is a minor update which increases the version number by 0.1 but surprisingly, it comes with quiet a number of improvements. Android 6.0.1 is bundled with new Emoji, quick launch camera shortcut, Do Not Disturb and Volume Controls, tweaked tablet UI, lag and security patches.


Thanks to the recognized developer, Chainfire, who released an updated version of SuperSU which supports Android 6.0.1. The SuperSU v2.62-3, while in beta, supports all Android 6.0.1 handsets.

How To Root Android 6.0.1 Marshmallow With SuperSU v2.62-2

1. Download the SuperSU file from the download link here. If you have downloaded it on your computer, connect your phone to your PC and transfer the zip file to the internal/external storage of the device.

2. Turn off your phone and use the appropriate key-combo method of going into recovery mode. Different Android phones have different key-combinations for going into recovery mode.
NOTE:
You need to have any custom recovery installed to use this method for rooting. See here: How to Flash Custom Recovery on Samsung Android DevicesHow to Flash Custom Recovery On All MTK Android Device: Tecno, Infinix, Wiko and Others | How to Flash Custom Recovery on HTC Android Devices

3. Select ‘Install’ in TWRP and navigate to the folder where the SuperSU file is located and flash it.

4. Now go back and reboot your phone. Wait for the phone to boot up and go to the app drawer. You should notice the newly installed SuperSU app. Lunch it. If it asks that you update the script, reply "YES" otherwise, run any of your root apps to confirm that you have successfully rooted your android device running android 6.0.1 or 6.0.

Advertisement

Similar Tutorials


When your iPhone Writes "Searching" Instead of Service Bars, What to Do

Here are few suggestions on how to solve the "Searching" issues with most iPhones. This continuous searching for network (Service Bars) is usually caused by abusing the phone in one way or another.

One of the problems common with iPhones is to "Displaying Searching" instead of the service bars. Although, not all iPhones do this, but it can be very frustrating when this happens.

So, each time this happens to your iPhone, here are few things to do in order to resolve the case with the phone.

1. Toggle the Airplane Mode: while your SIM card is still slotted in the iPhone, switch ON and OFF the Airplane (flight)  mode a few times to see if the iPhone would successfully search and connect to the network.

2. Reset the iPhone: if the first option fails, you may try this second option, meanwhile, you should be sure that your Find My iPhone option is turned off. See here: How to Check Find My iPhone Status.

To Reset your iPhone and  erase all content, go to Settings >> General >> Reset. From here, select Reset and Erase all Content.

3. Relaod the OS: in more critical situations, you may have to Reload the OS of the phone to correct the issue. For someone who has had basic knowledge of phone software repairs, it's quiet straight-forward to do otherwise, you need an expert in the field to reload your iPhone OS.

This is the last resort we have always used to correct the continuous "Searching" issues with iPhones.

Still Having Issues?
If you are still having issues having checked all the points above, Report the case here. An ArykTECH agent will attend to you.

Advertisement

Similar Tutorials


Download CM13 for OnePlus One and Update to Android 6.0 Marshmallow

OnePlus One users can now update their firmware to android 6.0 Marshmallow via the CM13 as the official CyanogenMod 13 is spotted on OnePlus One CyanogenMod page. The CM13 for the OnePlus One is fully functional, visually tweaked UI enhancements and updated Theme Engine still on a revamped custom ROM, CM13 build for OnePlus One which promises a complete Marshmallow experience.
CM13, Android 6.0 for OnePlus One

If you are a OnePlus One user and wishes to upgrade to the android 6.0 Marshmallow via the CM13, you can download the latest nightly builds of the CM13 ROM for the device, OnePlus One which is also codenamed "bacon" via official CyanogenMod download page and then follow the step-by-step guide as outlined below to install the ROM.

HOW TO INSTALL OFFICIAL CM13, Android 6.0 Marshmallow On OnePlus One

Pre-requisites:

  • Ensure that your phone has at least 80% battery charge to prevent unexpected device shutdown (due to battery drain) while installing the ROM. Failure to do so may result in fatal device malfunction.
  • Make a NAND Backup of your current ROM using your preferred Custom Recovery.
  • Ensure that you have the correct USB Drivers installed for your OnePlus One device.
  • Enable USB Debugging mode via Settings > Developer Options (if you are running Android 5.0 or above).  Or Settings > Applications > Development (if you are running Android 2.3 or earlier).
  • Ensure that your OnePlus One is bootloader unlocked and either ClockworkMOD or TWRP recovery installed.


NOW INSTALLING CM13, Android 6.0 Marshmallow on your OnePlus One

1. Download CM13, Android 6.0 Marshmallow for your OnePlus One from here. And download the Android 6.0 Marshmallow GApps from here.

2. Copy both files you downloaded above to the root of your SD Card/internal storage.

3. Reboot the phone to recovery.
NOTE:
- To boot OnePlus One to Recovery, Power off the Phone, press and Hold both Volume Down and Power Buttons together until the phone boots to recovery.
- You should have custom recovery flashed on your OnePlus One. Either TWRP, ClockworkMOD or Philz Custom Recovery is OK. See here: How to Flash Custom Recovery on OnePlus One | How to Unlock OnePlus One Bootloader

4. From the recovery, Wipe Data/Factory Reset the phone. This action normally wipes data, cache and delvik cache of the phone.

5. Flash the CM13 on your OnePlus One by selecting "INSTALL" from the recovery then, navigate to the location where the downloaded ROM is placed on the phone. Immediately flash the GApps following the same procedure.

6. Wipe/Factory Reset the phone again and then, reboot.
The first boot usually takes longer time, about 10 minutes. Allow the ROM to initialize and start all the apps properly and then, enjoy!.

Source: IBTimes

Advertisement

Similar Tutorials


When your iPhone Fails to Connect the Internet, What to Do

Few days ago, one of my clients complained that his iPhone 6 does not browse though 3G works perfectly on the phone and most times, he is in good coverage areas. Worst still, he just purchased the phone so he wasn't sure if the phone had ever browsed. He began contemplating that he had bought an inferior iPhone.

To his surprise, he brought the phone to me and in less than two minutes, the phone began to browse in full speed. He began to wonder how I did it. All I could say was " ignorance is a weakness".

Well, if you ever find yourself in similar situation, I discuss few stress-free checks you could do to correct the error and have stable-browsing iPhone.

1. Check your APN Settings: although, once valid SIM card is slotted in most iPhone, the device automatically brings the right configuration settings for the phone so that the phone start browsing immediately. However, networks like Glo have different APN settings for different data plan meanwhile, networks like MTN, Etisalat and Airtel uses the same configuration settings for all data plans.

In essence, make sure that your phone is configured using the right APN settings for your data plan.

2. Provision Service: make sure that your SIM card (in use) is provisioned with data service. You may call your network's customer care line to verify this however, the easiest way to confirm this is by slotting the SIM card in another phone and see if it browses.

3. VPN Apps: check to confirm that you have no VPN applications installed on the iPhone. Or that, the VPN application(s) installed are valid and properly configured for relaying internet connections.

If you don't know the right configuration for the VPN application, I suggest that you uninstall the VPN application(s) installed on the iPhone and restart it. Once restarted, attempt to browse using any application. The phone should browse.

Still having issues?
If you are still having issues having checked all the points above, Report the case here. An ArykTECH agent will attend to you.

Advertisement

Similar Tutorials


Use Multiple Whatsapp Account on iPhone without Jailbreak

There are times when you would want to use different Whatsapp account on the same phone using different phone numbers. If you have ever felt so, this trick lets you use multiple WhatsApp accounts – each with a different phone number – on a single iPhone, without the need for jailbreak on the device.

HOW TO USE MULTIPLE WHATSAPP ACCOUNT ON AN iPHONE

1. Download and install WhatsApp on your iPhone from the iOS App Store the usual way. Activate it using your main phone number.

2. Now to install another Whatsapp on the same iPhone, launch the Safari browser on your iPhone. On the browser address bar, navigate to this weblink: ios.othman.tv.

3. Once there, tap WhatsApp 2.

4. You should now see an orange colored WhatsApp icon, and just below it, a green button. Simply tap that green button to download WhatsApp 2.

5. Your device will now prompt you with a dialogue box asking you if you would want to install the app, or cancel it. Tap Install to begin the download.

By now, you may exit Safari and wait for WhatsApp 2 to be downloaded and installed on your iPhone.

6. Once installed, launch the Settings app, navigate to Settings > General > Profile.

7. Here, tap Trust “VNE Software and…” and when prompted to confirm, hit the Trust button.

8. Now launch the second WhatsApp installed on your Phone and follow the usual activation process, but this time, you are expected to use your other phone number for verification purposes otherwise; the first/main Whatsapp will deactivate your main line..

What is your take on this? Do you have other option? Share with us in the comment box below.
Source: RedmondPie
Advertisement

Similar Tutorials


Want to Jailbreak iOS 9.2? This is for you

Just early last week, iOS 9.2 final release is made available for download and all eligible Apple devices can now be upgraded to iOS 9.2. If you have observed it, Apple released iOS 9.0, 9.0.2, 9.1 and 9.2 in less than 90 days. What does this mean and how does it apply to you? Just read ahead.

Apple find it needful to update mostly when there is one hole or another to patch and these patches usually promote tighter security, making your Apple devices less controllable by you therefore, if you are an Apple device user who loves to gain a full control of his or her device, iOS 9.2 is not for you yet.

Why? iOS 9.1 and 9.2 patched Pangu Jailbreak and therefore, both iOS versions cannot be Jailbroken  for now.

Although, there is news that Pangu Jailbreak for the iOS 9.2 will soon hit us but until then, it's best you remain on iOS 9.0.2. If you have upgraded to the iOS 9.1 already, you may upgrade to iOS 9.2 though as there is yet any news  of any Jailbreak coming for the iOS 9.1.

DO YOU HAVE OTHER OPTIONS TO JAILBREAK iOS 9.2? Share with us in the comment.
Advertisement

Similar Tutorials


How to Backup Sony Xperia Devices TA Partition

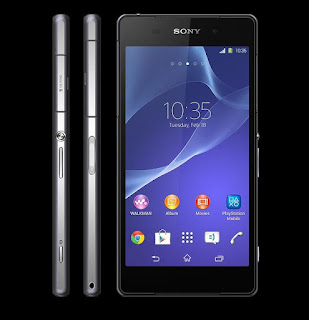
On Sony Xperia android devices, the partition that contains the DRM Keys, IMEI, Baseband and few other essentials of the Sony android devices is called TA. This partition is usually lost when you unlock your Sony android device's bootloader -I guess you know the risk already.

Loosing the TA partition means your Sony android device may never have network again -this is why it it is essential that you backup the TA partition before you unlock the bootloader of your Sony android device.

Here, I will walk you through the step by step guide on how to backup TA partition of Sony Xperia devices using TA Backup/Restore Tool.

HOW TO BACKUP XPERIA TA PARTITION

1. Download TA Backup/Restore Tool from here.
NOTE: this tool requires that your Sony Xperia be rooted. See DooM's Lord Tutorial for Rooting Xperia Devices here.

2. Extract the ZIP file to a folder on your PC.

3. Navigate to the folder where you have extracted the TA Backup Tool.
 NOTE: at this point, make sure no other program is using ADB.

4. Make sure the device is booted in normal mode (the way you normally use it) and that USB Debugging is enabled on the phone.
To enable USB Debugging, go to Setting >> About >> Phone Software and tap Build Number up to 7 times or more. Now, go back to setting. Developer Option should be viewable to you. Tap it and scroll to USB Debugging to enable it.

5. On the Backup TA Tool, Run Backup-TA.bat

6. Read the last paragraph of the license before continuing.

7. Read the information and follow the instructions given by the tool.

HAVE QUESTIONS? SEE THE LIST BELOW:

Q: Is my device supported?
A: Most likely yes. Most Xperia Devices are supported.

Q: Do I need to root my Xperia for this?
A: Yes, you do need root for both backup and restore to work.

Q: Can I use someone else's backup?
A: No, don't ever attempt this. It will hard-brick your device.

Q: Can I restore my TA.img file from Backup TA v4 and earlier or another tool?
A: Yes, choose "Convert TA.img" option in the menu.

Q: Does it bring back my DRM keys when I already unlocked my device before making a backup?
A: Not without a backup of the TA before it was ever unlocked.

Q: Will a restore relock the bootloader?
A: Yes, it will relock the bootloader like it was never unlocked.

Advertisement

Similar Tutorials