CM13 for Samsung Galaxy S6: Android 6.0.1 Marshmallow

Just few days ago, CM13, android 6.0 Marshmallow arrived for the Samsung Galaxy S6. Contrary to the previous AOSP version that's made available for the phone, the CM13 is much more stable with only few things off the line.

So, if you have grown tired of the stock experience on your Samsung Galaxy S6, now you can flash a beta build of CyannogenMod 13. This build is from an XDA senior member ‘sktjdgns118’ and it is the first public CM13 build for the Galaxy S6 which is based on Android 6.0.1 Marshmallow.

What's Working in the ROM: CM 13 for SAMSUNG GALAXY S6


  • Basic 2D graphics
  • WiFi and Hotspot
  • Audio and microphone
  • SMS, MMS
  • Mobile data (RIL, 3G, LTE)
  • GPS, NFC, MTP and other connectivity


What's Not Working in the ROM
Camera, Sensors and everything else are reported as unstable, buggy and or not working at all.

This CM13 is available for which Samsung Galaxy S6 Variants?

Galaxy S6 International (SM-G920F/I, zerofltexx)
Galaxy S6 SK (SM-G920S, zeroflteskt)
Galaxy S6 KT (SM-G920K, zerofltektt)

Above is the list of Samsung Galaxy S6 Variants compatible with this ROM.

If you own any of the models mentioned above, then you can continue with the guide below to flash the ROM on your Samsung Galaxy S6.

HOW TO INSTALL CyanogenMod 13, ANDROID 6.0.1 ROM on SAMSUNG GALAXY S6


1. Download the CyanogenMod 13 ROM for the Samsung Galaxy S6 here and move it to the internal storage of the phone.
NOTE:
- You should move the downloaded ROM to the ROOT folder of the storage.
- Google Gapps are not working at the moment with the ROM.

2. Turn the phone off and boot into TWRP or Philz (power + home + volume up). See here: How to Flash Custom Recovery (TWRP) On Samsung Galaxy S6

3. While in recovery, wipe, factory reset the phone. This normally wipes data and cache (optionally, delvic cache).

4. Then go to ‘Install’ and navigate to the folder where the ROM is located and flash it.

5. Reboot your phone. The first boot may take longer than usual and that should be about 10 minutes.
Once the first initialization is complete, your Samsung Galaxy S6 will boot into CM13.

Advertisement

Similar Tutorials


Jailbreak Tools for iPhone, iPad and iPod Touch

There are many tools available on the internet that can be used to jailbreak your iPhone, iPad or iPod touch in just a few steps. Below you can find the download links to some of the most popular Jailbreak tools available that are capable of jailbreaking most versions of iOS.

Each with its flexibility and methods, the end result is the same. You can Jailbreak your iPhone, iPad or iPod touch provided that you have used the right tool for your version of iOS.

We will update this page with detailed guides for all of these tools as we proceed.

iOS 9 Jailbreak Tools:
Pangu9 Jailbreak Tool: Download Pangu for Windows here | For Mac Here
Taig for iOS 9 Jailbreak Tool: Download Taig for Windows here | For Mac Here
PP Assistant iOS 9 Jailbreak Tool: Download for Windows Here | For Mac Here

iOS 8 Jailbreak Tools:
Pangu8 for iOS 8 Jailbreak: Download Pangu8 for Windows Here | For Mac Here

iOS 7 Jailbreak Tools:
Evasi0n7 (1.0.3) for iOS 7 Jailbreak: Download Evasi0n7 for Windows Here | For Mac Here
Evasi0n7 (1.0.2) for iOS 7 Jailbreak: Download Evasi0n7 for Windows Here | For Mac Here
Evasi0n7 (1.0.1) for iOS 7 Jailbreak: Download Evasi0n7 for Windows Here | For Mac Here

Download P0sixspwn Jailbreak Tool for Windows Here | For Mac Here

iOS 6 Jailbreak Tool:
Redsn0w Jailbreak Tool for iOS 6 downward. Download Redsn0w for Windows Here | For Mac Here
Download Sn0wbreez v2.9.14 here

Older version of Evasi0n Jailbreak Tool Here:
Evasi0n 1.5.3 for WindowsEvasi0n 1.5.3 for MacEvasi0n 1.5.3 for Linux

Apple TV Tool:
Season Pass for Apple TV: Windows Versions Here and Mac Version Here

Advertisement

Similar Tutorials


Samsung Galaxy S3 Android 6.0, CM13 Custom ROM Download

Samsung Galaxy S3 receives android 6.0 Marshmallow -thanks to Android Open Source Project. The second custom ROM based on Android 6.0 Marshmallow for the Samsung Galaxy S3 has also made its way to the developments floor.

This second ROM is CyanogenMod 13, which has a lot more features and it is more stable for this low-end-phone for which you might doubt android 6.0, Marshmallow would ever be available. The CyanogenMod 13 is based on the latest CM sources and features Android 6.0.1 Marshmallow on board, which is an update over the for Android 6.0 version.

What's Working in the ROM, CM13 for Galaxy S3:


  • Basic 2D graphics
  • WiFi and Hotspot
  • Audio and microphone
  • SMS, MMS
  • Mobile data (RIL, 3G, LTE)
  • GPS, NFC, MTP and other connectivity


What's Not Working or Buggy:

non-FAT32 SD cards
WiFi P2P.

HOW TO INSTALL CM13, ANDROID 6.0 ON SAMSUNG GALAXY S3

1. Download both required files, the CyanogenMod 13 Android 6.0.1 Marshmallow ROM and Marshmallow Gapps for the Samsung Galaxy S3. Move both files to the internal storage of your Samsung Galaxy S3.

2. Turn your Galaxy S3 off and boot into recovery mode.
NOTE:
You should have custom recovery flashed already. See here: How to Flash Custom Recovery On Samsung Android Devices.
How to Boot Samsung Android to RecoveryPress and hold the volume up, home and power keys at the same time.
3. Once in recovery, make a full Nandroid backup.
The is a must in case you ever wish to go back to your previous ROM.

4. Wipe data, cache and delvik cache.

5. Flash CM13 ROM and then flash Marshmallow Gapps.
To flash the ROM, select Install and then, navigate to the folder where the ROM is located. The same process goes for the GApps.

Reboot your phone and enjoy Android 6.0.1 on your Samsung Galaxy S3.

Credit: forkbomb444
Advertisement

Similar Tutorials


How to Root Android 6.0, 6.0.1 Marshmallow

Rooting android 6.0 Marshmallow is just the same as rooting android 5.0 Lollipop. Since one-click root is not available for these android versions yet, the most suitable, risk-free and easy method to obtain root-access is to flash SU Script from recovery on your phone.

Here, I discuss how to root android 6.0 and 6.0.1 Marshmallow by flashing SU Script onto the phone from recovery.

Android 6.0.1 is available and already running on a select number of Android devices. It is a minor update which increases the version number by 0.1 but surprisingly, it comes with quiet a number of improvements. Android 6.0.1 is bundled with new Emoji, quick launch camera shortcut, Do Not Disturb and Volume Controls, tweaked tablet UI, lag and security patches.


Thanks to the recognized developer, Chainfire, who released an updated version of SuperSU which supports Android 6.0.1. The SuperSU v2.62-3, while in beta, supports all Android 6.0.1 handsets.

How To Root Android 6.0.1 Marshmallow With SuperSU v2.62-2

1. Download the SuperSU file from the download link here. If you have downloaded it on your computer, connect your phone to your PC and transfer the zip file to the internal/external storage of the device.

2. Turn off your phone and use the appropriate key-combo method of going into recovery mode. Different Android phones have different key-combinations for going into recovery mode.
NOTE:
You need to have any custom recovery installed to use this method for rooting. See here: How to Flash Custom Recovery on Samsung Android DevicesHow to Flash Custom Recovery On All MTK Android Device: Tecno, Infinix, Wiko and Others | How to Flash Custom Recovery on HTC Android Devices

3. Select ‘Install’ in TWRP and navigate to the folder where the SuperSU file is located and flash it.

4. Now go back and reboot your phone. Wait for the phone to boot up and go to the app drawer. You should notice the newly installed SuperSU app. Lunch it. If it asks that you update the script, reply "YES" otherwise, run any of your root apps to confirm that you have successfully rooted your android device running android 6.0.1 or 6.0.

Advertisement

Similar Tutorials


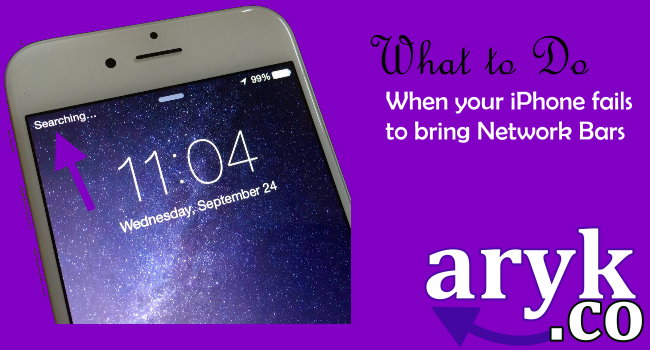
When your iPhone Writes "Searching" Instead of Service Bars, What to Do

Here are few suggestions on how to solve the "Searching" issues with most iPhones. This continuous searching for network (Service Bars) is usually caused by abusing the phone in one way or another.

One of the problems common with iPhones is to "Displaying Searching" instead of the service bars. Although, not all iPhones do this, but it can be very frustrating when this happens.

So, each time this happens to your iPhone, here are few things to do in order to resolve the case with the phone.

1. Toggle the Airplane Mode: while your SIM card is still slotted in the iPhone, switch ON and OFF the Airplane (flight)  mode a few times to see if the iPhone would successfully search and connect to the network.

2. Reset the iPhone: if the first option fails, you may try this second option, meanwhile, you should be sure that your Find My iPhone option is turned off. See here: How to Check Find My iPhone Status.

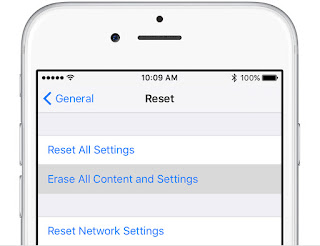
To Reset your iPhone and  erase all content, go to Settings >> General >> Reset. From here, select Reset and Erase all Content.

3. Relaod the OS: in more critical situations, you may have to Reload the OS of the phone to correct the issue. For someone who has had basic knowledge of phone software repairs, it's quiet straight-forward to do otherwise, you need an expert in the field to reload your iPhone OS.

This is the last resort we have always used to correct the continuous "Searching" issues with iPhones.

Still Having Issues?
If you are still having issues having checked all the points above, Report the case here. An ArykTECH agent will attend to you.

Advertisement

Similar Tutorials


Download CM13 for OnePlus One and Update to Android 6.0 Marshmallow

OnePlus One users can now update their firmware to android 6.0 Marshmallow via the CM13 as the official CyanogenMod 13 is spotted on OnePlus One CyanogenMod page. The CM13 for the OnePlus One is fully functional, visually tweaked UI enhancements and updated Theme Engine still on a revamped custom ROM, CM13 build for OnePlus One which promises a complete Marshmallow experience.
CM13, Android 6.0 for OnePlus One

If you are a OnePlus One user and wishes to upgrade to the android 6.0 Marshmallow via the CM13, you can download the latest nightly builds of the CM13 ROM for the device, OnePlus One which is also codenamed "bacon" via official CyanogenMod download page and then follow the step-by-step guide as outlined below to install the ROM.

HOW TO INSTALL OFFICIAL CM13, Android 6.0 Marshmallow On OnePlus One

Pre-requisites:

  • Ensure that your phone has at least 80% battery charge to prevent unexpected device shutdown (due to battery drain) while installing the ROM. Failure to do so may result in fatal device malfunction.
  • Make a NAND Backup of your current ROM using your preferred Custom Recovery.
  • Ensure that you have the correct USB Drivers installed for your OnePlus One device.
  • Enable USB Debugging mode via Settings > Developer Options (if you are running Android 5.0 or above).  Or Settings > Applications > Development (if you are running Android 2.3 or earlier).
  • Ensure that your OnePlus One is bootloader unlocked and either ClockworkMOD or TWRP recovery installed.


NOW INSTALLING CM13, Android 6.0 Marshmallow on your OnePlus One

1. Download CM13, Android 6.0 Marshmallow for your OnePlus One from here. And download the Android 6.0 Marshmallow GApps from here.

2. Copy both files you downloaded above to the root of your SD Card/internal storage.

3. Reboot the phone to recovery.
NOTE:
- To boot OnePlus One to Recovery, Power off the Phone, press and Hold both Volume Down and Power Buttons together until the phone boots to recovery.
- You should have custom recovery flashed on your OnePlus One. Either TWRP, ClockworkMOD or Philz Custom Recovery is OK. See here: How to Flash Custom Recovery on OnePlus One | How to Unlock OnePlus One Bootloader

4. From the recovery, Wipe Data/Factory Reset the phone. This action normally wipes data, cache and delvik cache of the phone.

5. Flash the CM13 on your OnePlus One by selecting "INSTALL" from the recovery then, navigate to the location where the downloaded ROM is placed on the phone. Immediately flash the GApps following the same procedure.

6. Wipe/Factory Reset the phone again and then, reboot.
The first boot usually takes longer time, about 10 minutes. Allow the ROM to initialize and start all the apps properly and then, enjoy!.

Source: IBTimes

Advertisement

Similar Tutorials


When your iPhone Fails to Connect the Internet, What to Do

Few days ago, one of my clients complained that his iPhone 6 does not browse though 3G works perfectly on the phone and most times, he is in good coverage areas. Worst still, he just purchased the phone so he wasn't sure if the phone had ever browsed. He began contemplating that he had bought an inferior iPhone.

To his surprise, he brought the phone to me and in less than two minutes, the phone began to browse in full speed. He began to wonder how I did it. All I could say was " ignorance is a weakness".

Well, if you ever find yourself in similar situation, I discuss few stress-free checks you could do to correct the error and have stable-browsing iPhone.

1. Check your APN Settings: although, once valid SIM card is slotted in most iPhone, the device automatically brings the right configuration settings for the phone so that the phone start browsing immediately. However, networks like Glo have different APN settings for different data plan meanwhile, networks like MTN, Etisalat and Airtel uses the same configuration settings for all data plans.

In essence, make sure that your phone is configured using the right APN settings for your data plan.

2. Provision Service: make sure that your SIM card (in use) is provisioned with data service. You may call your network's customer care line to verify this however, the easiest way to confirm this is by slotting the SIM card in another phone and see if it browses.

3. VPN Apps: check to confirm that you have no VPN applications installed on the iPhone. Or that, the VPN application(s) installed are valid and properly configured for relaying internet connections.

If you don't know the right configuration for the VPN application, I suggest that you uninstall the VPN application(s) installed on the iPhone and restart it. Once restarted, attempt to browse using any application. The phone should browse.

Still having issues?
If you are still having issues having checked all the points above, Report the case here. An ArykTECH agent will attend to you.

Advertisement

Similar Tutorials