How to Root Any Samsung Android


Rooting android devices has become so common that if anyone thinks of getting an android device today, he would think of rooting it.

There are so many ways to gain root access on any android device but one method is safer to another and, not all the methods work with all android phones.

Worst still, you could brick your android device while trying to root the phone -the reason why you should consider using the safest method.
Here, we discuss the safest way to permanently root any Samsung android device. Even the latest 4.4.4 Samsung androids.

Rooting your Samsung Android Device

To begin with, please note that this method works ONLY with Samsung android devices that has any custom recovery flashed. Check here for the step by step guides on how to flash custom recovery on Samsung android devices.

If you have flashed custom recovery on your Samsung android device, you can proceed with the methods as given below;
1- Download the latest SuperUser.zip file.

2- Copy and paste the downloaded SuperUser.zip file on the root of either your SD Card or the phone's mass storage.

3- Reboot the phone to recovery by either using command lines or using the right key combinations. How? Switch off the phone, now press the Home + Volume Up + Power buttons together at once for few seconds until the phone comes up, wait for like 3 seconds (by timing) then; release the keys. The phone should boot to recovery by itself.

4- In either CM, TWRP or 4ext, whichever custom recovery you use, just select Install ZIP from SD Card.

5- Navigate to the SuperUser.zip file you just download above and select it. Confirm to flash the file and wait few seconds for the process to complete.

6- Reboot the phone and begin enjoying the use of the rooted android device!

NOTICE
The SuperUser.zip file download link is not included to control the number of downloads we receive. Please, use the Contact Link above to request for the download link. Thank you.

5 Things that Brick Android Devices -Soft or Hard

When an android device is bricked, it simply means that the android device is not more than a paper weight; useless at that point in time.

A bricked android device simply hang on bootloop or fails to boot on at all.

Here and there on the internet, you may have seen some issues and stories about bricked android devices and probably wondering what might have been the cause.

Here, we would explain five (5) main causes of android bricked state.

Corrupt Bootloader

The first thing that may render your android device useless (brick) is the bootloader. In android, the bootloader is what starts either the Android or Recovery. And because the bootloader performs crucial tasks, it is not easily spoilt or corrupted.

However, by one means or another, if the bootloader get corrupted or replaced by another bootloader that is not for the exact phone; the phone gets bricked.
An android device bricked by the bootloader is hardly fixable! So, don't toy with the bootloader except that you really know what you are doing.

ROM/Firmware Variant

In android, ROM is basically what contains all the files and codes necessary to boot and run android on your phone.

An android device could get bricked if a wrong ROM/firmware is flashed on the phone. The ROM is mostly specific for a particular phone. Even the same phone made for different carriers might not use the same ROM.
Example:
A Samsung Galaxy S4 made for China Mobile may not use the same ROM as Samsung Galaxy S4 made for ATT.

Although, android device bricked by means of a wrong ROM/firmware (flashed) is a soft-brick and is easily reversible. You must still be very specific at flashing ROMs/Firmwares on your android devices.

Invalid Kernel

All the interractions between the hardwares and the softwares on an android device are being handled by the kernel.
Flashing a wrong kernel on an android device could also result to a brick state. As a matter of fact, it could result to a hard-brick depending on the kind of phone.

Invalid Radio/Baseband

When an upgrade is done on an android devices, you might be required to change your baseband/radio -this is normal. However, flashing a wrong radio/baseband file on your android device might as well get the device bricked.

Root Applications

If you search the internet today, what eventually render most android devices useless is any of the root applications.

Although, rooted android devices are so enjoyable to use, abusing their root privileges could be so harmful to any android device.

Always becareful while using root-applications (applications that require root privileges) on your android devices especially; most applications that are being used to change android fonts.

ProTips:
- It is a good practice to backing up your android device using your favourite custom recovery. This can always help you revert your phone to its previous state easily.
- Do always make sure that you know exactly what you are doing when using any root application on your android device. 

How to Flash Custom Recovery On Samsung Androids Using ODIN

 For everyone willing to flash a custom ROM on any android device, having a custom recovery flashed on the phone is the first step however, the method for flashing custom recovery on android devices varies. In the case of Samsung android devices, there are varieties of methods and each of which shall be discussed one after another.

In this page, we will be discussing how to flash custom recovery on samsung android devices using ODIN.

What is ODIN

ODIN is a Windows based utility tool developed basically for samsung android devices. Using the ODIN, you can easily flash custom recovery, kernel, radios even stock firmwares amongst others on your samsung android devices with just One Click.

How to Flash Custom Recovery On Samsung Androids Using ODIN

1- First, download ODIN file.

2- Extract the ODIN zip file anywhere on your desktop.

3- Download a .tar file of the recovery you wish to flash. Because ODIN flashes only .tar file, TWRP recovery is your best chance here.
You can get TWRP recovery from here.

4- Place the downloaded .tar recovery file anywhere on your PC.

5- Open the folder where you extracted the ODIN file and lunch the ODIN.exe by double-clicking it.

6- Now, put your Samsung Android device into download mode by using the appropriate key combinations. Usually, it is by pressing the Home + Volume Down + Power Buttons together.

7- Once in Download Mode, connect the phone to the PC and wait until ODIN detects the phone.
ODIN has detected the phone when you notice that the first box space of ODIN is filled with yellow and writes out some codes.

8- Now, Mark the box before PDA then, click on the PDA. Navigate to the folder where you saved your .tar recovery file and select it.

9- Unmark the Auto-reboot and leave the rest options.

10- Finally, click Start. Wait for the process to complete then, disconnect the phone from the PC.

NOTE:
You should boot the phone straight to the recovery mode immediately you disconnect it from the PC and before it boots on otherwise, the stock recovery would over-write your newly flashed recovery and it would seem as if you never flashed a custom recovery on the phone.

Special FREE Tutorials for Phone Software Repairs

This page is created for those who wish to learn how to repair mobile phones software related problems FREE of Charge. The mobile phones covered are Androids, Blackberry, Nokia (Symbian, Java, Nomandi) and iOS (On request).

If you are interested the FULL-TIME mobile phones software repairs training, in our workshop for 10 DAYS excluding Sundays, you can contact me: 0807 788 8311 (Whatsapp & Messages ONLY).


Within these pages, other tutorials not covered in the training kits would also be discussed. On each page, you can comment, discuss and share your opinions on each topic being discussed.

Wants more?
If you wish, you can request to join the one-on-one interactive group discussion on Whatsapp at a cost of N1,500 ONLY.

What you will Learn on Whatsapp
If you join the Whatsapp Group Discussion, you will learn how to;

NOKIA
1- Flash Nokia Phones
2- Unlock Nokia Phones
3- Upgrade Nokia Phones
4- Downgrade Nokia Phones
5- Nokia Browsing Configurations And Cheats

ANDROID
1- Flash all android devices
2- Upgrade all android devices
3- Root all android devices
4- Common Software problems of common android devices
5- Unbrick android devices
6- Android browsing cheats and configurations

Blackberry
1- Flash Blackberry phones
2- Upgrade Blackberry phones
3- Downgrade Blackberry phones
4- Unlock Security Lock on Blackberry phones

Bonuses/Extrass
1- How to Network/SIM Unlock All HTC Androids
2- How to Network/SIM Unlock All Blackberry phones

Time And Schedules of the Whatsapp Group Discussion
To avoid any disturbances from either your daily activities or mine, I have concluded to schedule the Whatsapp Group Discussion as follows;
Mondays to Fridays: 8pm - 10pm
Saturdays and Sundays: 4.30pm - 6.30pm

The training would be for 1 month (30 Days). And you are allowed to ask any questions ONLY within the group discussion periods.

Don't Want Whatsapp Group? You Can Still Learn Software Repairs Here
 If you wish to enjoying the free online training tutorials, you can just click on each of the respective link below;
Android Training Tutorial
Blackberry Training Tutorial
Nokia Training Tutorial
iOS Training Tutorial
PLEASE NOTE
You must make payment before you join the Whatsapp Group Discussions. If you cannot pay before you join, don't border to contact me at all.

Contacts
1- Emails: admin@arykblog.info help@arykblog.info
2- BBM: 768B9576
4- Phone Number: 0807 788 8311 0808 599 7677

How to Change MTK Androids' IMEI -Tecno, iTel, Infinix And Others


When we are talking of MTK Androids, we are talking about Tecno, Infinix, Oppsson, iTel and other ported MTK android devices (Nigerians refer to them as China androids).

In this tutorial, we will be discussing how to change your MTK android device's IMEI to a Blackberry device's IMEI to enable you use some networks' BIS (Blackberry Internet Service) on your MTK androids.

How Does it Work?

You might be wondering how it works or maybe changing the IMEI has any adverse effects on your MTK android. Below is the answer that solves such curiousity.

Changing the IMEI makes the phone appears to most network providers as a Blackberry device and as a result of this, all Blackberry Internet Services are made available for the phone.

The ONLY effect it (Changing of IMEI) has on phones is that it turns your android phone to a Blackberry by identity. All the functionalities of your android device remains the same.

How to Change MTK Androids IMEI to A Blackberry Device IMEI

This tutorial explains how to change your MTK android IMEI to a Blackberry (Or, any device IMEI) using MTK Engineering MOD, downloadable from the Google PlayStore.

1- Download MTK Engineering Mod from the PlayStore.
2- Open/Lunch the MTK Engineering Mode on your phone.
3- Click/Select MTK Settings.
4- Navigate left to Connectivity.
5- On the connectivity panel, select CDS Information.
6- On the CDS section, select Radio Information.
7- Now, select either the SIM1 or SIM2, depending on whichever SIM you wish to change its IMEI.
8- On this page, click on the AT+. About four (4) options should be presented to you, just choose either of this options below:
AT+ EGMR=1,10,"" -for SIM 2
AT+ EGMR=1,7,"" -for SIM 1

Don't forget to put the IMEI you wish to change to in-between this signs "" above.
9- Now, tap/click the Send AT Command option.

You can now enjoy better and cheaper internet access on your MTK android devices using the Blackberry BIS.


For any comments or questions over this article please, use the comment box bellow or contact us Via This Link. And if your questions is not about this article and needs our help over something related, Find Us on Facebook. Got any other info you want us discuss? Share it with us using the comment box or contact us!

Buying UK Used iPhone? 4 Things You Must Know


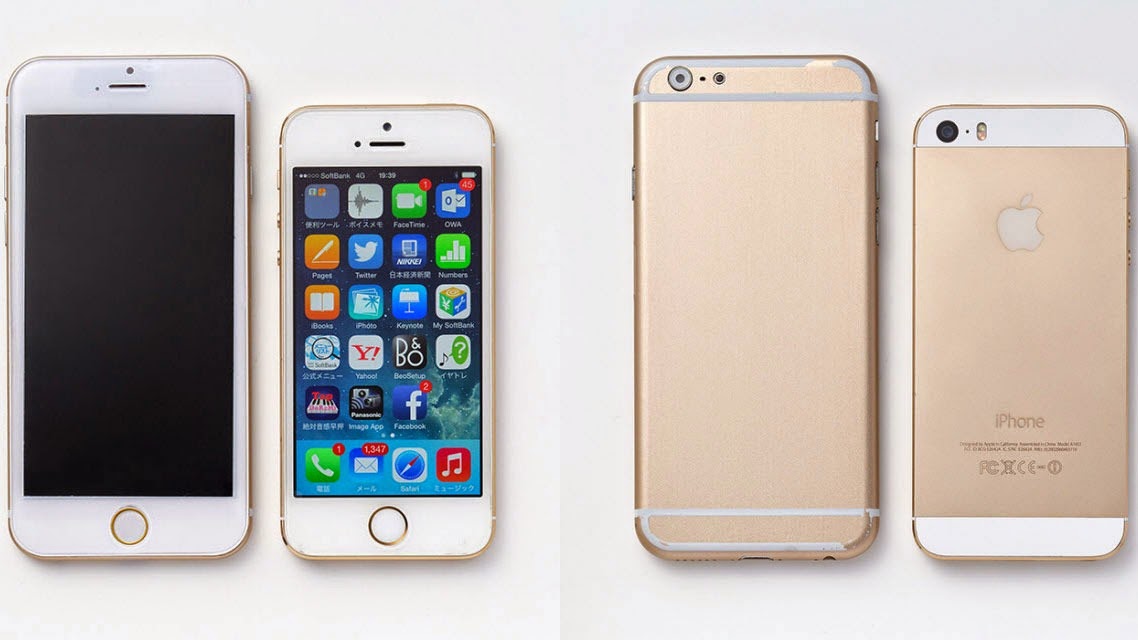
Since the iPhone 6 and iPhone 6 Plus are on the way into the market, earlier iPhones, (starting from the iPhone 5, 5s, 5c downward) would witness an ugly experience in value. By this, I mean their prices would seriously fall and as a result of this, many would be willing to sell their earlier iPhones out in the quest to upgrade to either the iPhone 6 or iPhone 6 Plus.

Meanwhile, before you purchase any iPhone at all, especially; any of the iPhones built with the A5(+) chips, you should be mindful of these four (4) factors that can seize the phone from you at any point in time.

In this category are the iPhones 4s, 5, 5s, 5c and beyond.

Blacklist:

Before you purchase any of the iPhones mentioned above i.e iPhone 4s, 5, 5s, 5c and beyond as a second hand or UK used, you should make sure that the iPhone is not Blacklisted.
An iPhone is put on a Blacklist when it is reported stolen or missing to the Network provider from which the iPhone is originally procured.

At first, the reported iPhone may be working fine, until it is either upgraded, downgraded or factory reset for any reason at all.

If that happens, you may never get access to the iPhone again until it is removed from the Blacklist. And removing such phones from Blacklist would surely cost you additional money.

iCloud Account:

The first thing you should try to do at the point you are transacting the iPhone is to change the iCloud credentials on the phone.

Frankly speaking, the iCloud security on A5(+) chips iOS devices are quiet strong and not easily accessible. I am talking from experience. From about fiften (15) iPhones that have been brought to me to remove iCloud on, I could only do just NINE (9) successfully.

Imagine you bought an iPhone for N45,000 and you (intentionally or unintentionally) factory reset or upgrade the phone and during the phone first use setup you are stuck at the iCloud sign in.

This is a kind of mistake that had cost so many people about N25,000 to correct and even many more could not use their iPhones again just because of iCloud.

So, be sure that you replace the iCloud credenttial on the iPhone you are going to buy with your own iCloud details before you even pay money at all.

Find MyiPhone Service

Find MyiPhone is another security service that enables iPhone users secure, locate and lock their iPhones remotely.

An iPhone could be working fine even if Find MyiPhone is turned on for the iPhone until you do anything that makes you reset the iPhone. This case is closely related to the iCloud, too.

Original Network:

Although, this is a minor case but it's worth talking about.
Just in case and for any reason, you ever wish to re-unlock the iPhone, it would be more easier for you to unlock if you already the original network/GSM service provider the iPhone is locked to.

By this, I hope you find this information useful and I hope you don't fall victim of such in your quest to the iPhone world.

If you have any questions to ask or opinions to share, kindly use the comment box below.

6 Things that Make iPhone 6 More Enjoyable to Use


The much awaited iPhone 6 is finally coming out with its twin-superior; the iPhone 6 Plus.

With this news, the anticipation is expected to be over and the recent curiosity from the iPhones fans is expected to be over soon, too. Meanwhile, while you await the introduction of the new iPhone 6 and iPhone 6 Plus in the market, here are some tips that might help you enjoy your iPhone 6 and iPhone 6 Plus long enough.

iCloud

The iCloud is a cloud storage and cloud computing service from Apple.
The iCloud allows users to store data such as music and multimedia files and iOS applications on remote computer servers for download to multiple devices such as iOS-based devices running OS 5 or later.

With the use of the iCloud service, your use of the iPhone 6 and iPhone 6 Plus could be made more fun and enjoyable however; your iCloud details must not be forgotten otherwise, you might find it difficult accessing the iPhone in some ways.

Find MyiPhone Service

Find MyiPhone is a security service built-in with most iPhones. This security service helps you secure, lock and locate your iPhone remotely in case you loose it either, by a means of thieft or whatever reason.

The Find MyiPhone service uses your iCloud credentials to protect your iPhone and you can always login to your iCloud account to turn on/off your Find MyiPhone service remotely.

Meanwhile, by using the Find MyiPhone service, you can be sure that you are in control of your iPhone 6 and or iPhone 6 Plus at all times.

Jailbreaks And Tweaks

When you Jailbreak an iPhone, you break the iPhone free from the Jail it is put by Apple. By default, Apple put many restrictions on the iPhone meanwhile, Jailbreaking any iPhone helps you customize the iPhone anyhow you want by letting you install many applications and tweaks you ordinarily might not be able to install on the iPhone.

More importantly, Jailbreaks let you gain access to the root folder of your iPhones and this can be so helpful when it comes to backing up important files on the iPhone.
However, since the iPhone 6 and the iPhone 6 Plus are still very new in the market, you should be very carefull Jailbreaking any of the iPhones.

OTA Updates

From time to time, Apple pushes OTA (Over the Air) updates on most iPhones to update their firmwares and basebands to enhance the performances of the iPhones.

Depending on the configuration, the process might wipe off all the files on your iPhone on completion however; one thing is certain, you will have to setup the iPhone for the first use after the update process is completed.

During setup, you most likely have to sign in using the email address that is used to setup the iPhone for the very first time or the last email/iCloud account the iPhone was configured with before the update.

That said, before you respond to any OTA Updates or Wipe the iPhone, you need to be sure of the followings;
1- Be sure that you know the iCloud details the phone is already connected with.
2- Make sure that Find MyiPhone is turned off for the iPhone.
3- Be sure that the iPhone 6 or iPhone 6 Plus is not locked to a network other than the network you are using on the phone.

Backups

In iPhones, every backup you make can do just more than saving your files. It could mean saving your phones sometimes.

Either on your local disk (PC Hardisk or External Drives) or on the iCloud, do make sure that you always have the entire content of your iPhone 6 or iPhone 6 Plus backed up.

You can make it weekly or bimonthly, it is always important to backing up the iPhone from time to time.

If you have any specific request or help regarding your use of your iPhone 6 or iPhone 6 Plus, or any other iPhone; kindly use the comment box below.

5 Must Have Android Applications For Students


Although, individual differences and attachments may alter the list I have here, but I have gathered five (5) android applications I found very useful for students.

Personally, I have used these applications and still have them on my android devices, and they have proven so useful for learning and research purposes.

So, if you do not have any or all of them, I suggest you try them out but first; check the list below to get an idea of what each of them has to offer you.

Mariam Webstar Dictionary:

Mariam webstar dictionary is an offline dictionry downloadable from the PlayStore or Mobomarket that requirs only a one-time download. Once installed, you have no further use of internet access to use the dictionary however, to use the Voice Pronounciation feature of the dictionary; you would need internet access.

This is a very useful productivity application for students as it could be so helpful for your studies and research purposes.

Google Translate:

Basically for research purposes, Google Translate is an amazing utility application for android devices. It helps you translate words written in one language to another language.
I persionally use the Google Translate to complete my review on the book Timeline by Micheal Critchton.

Free Online eBOOK:

As the name implies, Free Online eBOOK brings all the classical and comics books on the internet to your phone. Both free and premium eBOOKS.

If you feel like adding a directory that contains your favourite eBOOKS, you can still add it up to the list of directories from which the application downloads eBOOKS from. Also, you can read .epub, .pdf, .mobi, .doc and many other eBOOK formats using the application.

You can download the Free Online eBOOK from Mobomarket.

Color Note:

This is an application I use from time to time everyday.
One of the best yet simple note applications on the Google PlayStore. With Colour Note, you can simply jot down anything; maybe a note, an article, a webpage or just anything you feel like putting down.

The most beautiful part of this is that Colour Note syncronizes your notes both on the SD Card and either, facebook or Google so that you never worry about loosing your notes. Even when you change your phone, you can always restore backup from your SD Card or syncronise your notes using either your facebook or Google account.

Videoder:

Videoder is another amazing application that helps you download all kinds of videos from Youtube.

In case you ever need any tutorial, you can simply open Videoder on your android device, search for the tutorial and download straight from there.

You can download Videoder from Google PLayStore or Mobomarket.

If you know of another application that should be added to the list, kindly share it with others using the comment box below this page.

iPhone 6: What you Should Know About the iPhone 6


Finally, the anticipation is gone and the much awaited iPhone 6 and iPhone 6 plus have being released.

As usuall, it has become a custom for Apple to releasing variants of whichever iPhone is released. As in the case of iPhone 3g and 3gs, iPhone 4 and 4s, iPhone 5, 5s and 5c.

And now, the iPhone 6 series has just begun with the release of two variants; the iPhone 6 (4.7inch) and iPhone 6 Plus (5.5 inch).

Introduction to the iPhone 6 Series

Look And Feel

With the much wider 4.7inch size, the Apple iPhone 6 feels good at grasp and as for those who prefer more wider screen, the Apple iPhone 6 plus with the 5.5inch size is an option.

Once again, the slicky designs of the iPhones is diplayed in the iPhone 6. With the rounded edges brased with glasses, all contained in fine water-like metal gives the iPhone 6 its compact feel.

Camera And Video

As expected, face detection as well as smile and blink detection are built in the new iPhone 6 though, it might not have the pixel boost expected by fans; it's 8-megepixel iSight camera has imaging chip that is capable of handling noise better. Also, the HDR is now automatically applied.

Apple Pay And NFC

Having resisted the NFC, Near-Field Communication for many years, the iPhone 6 and iPhone 6plus do not only feature the short-range communication protocol but also, Apple Pay, a mobile payment system is built around it to complement the NFC.

The Apple Pay system built in the iPhone 6 and iPhone 6plus is currently (as at the released time), usable only by the US residents.

Availability

As gathered from the CNet Reviews, the iPhone 6 and the iPhone 6 plus will be lunched in ten countries in September 19, with pre-orders beginning Semptember 12.

The ten countries include: the US, the UK, Australia, Canada, France, Germany, Hong Kong, Japan, Puerto Rico and Singapore.

Pricing

As for the pricing, nothing conclusive could be written here as no precise amount could be given.

However,it is noted that in the UK, an Unlocked iPhone 6 (16GB) would be sold for £539, £619 64GB model and £699 for the 128GB models.

Colours
The iPhone 6 and iPhone 6 plus comes in three different vibrant colours: Gold, Silver and Space grey.

For any comments or questions over this article please, use the comment box bellow or contact us Via This Link. And if your questions is not about this article and needs our help over something related, Find Us on Facebook. Got any other info you want us discuss? Share it with us using the comment box or contact us!

Dead Nokia Phone Repair/Refurbish Guide -Using Phoenix Software


A dead Nokia phone could be refurbished and be brought back to live if the problem is not associated to any hardware problem on the phone. A Nokia phone that fails to come on at all or, a Nokia phone that only vibrates when the power button is pressed is referred to as A Dead Nokia Phone.

Here, we discuss how to repair and refurbish a dead Nokia phone using phoenix service software.

Likely Cause of A Dead Nokia Phone

There a number of things that may cause a Nokia phone to be dead and they are;
1- Firmware Issues: a Nokia phone could become DEAD while trying to upgrade or flash the phone.

Flashing a Nokia phone with a firmware version that is older than the firmware version already on the phone could cause the Nokia phone to become dead.

2- Corrupt System Files: by one means or another, if the Nokia phone system file is corrupted, then; it would result to this (Dead Mode).

Solution:
To bring a dead Nokia phone back to live, there is ONLY one thing you have to do and it is flashing the phone using Phoenix Service Software.

Meanwhile, in cases like this, you have to flash the phone using the most recent flash files for that particular phone and downloaded from the Nokia database.

To download the latest Nokia flash files for any Nokia devices, visit this page here.
And to flash Nokia phones using the Phoenix Service Software, visit this page for the tutorial.


For any comments or questions over this article please, use the comment box bellow or contact us Via This Link. And if your questions is not about this article and needs our help over something related, Find Us on Facebook. Got any other info you want us discuss? Share it with us using the comment box or contact us!

Fix Windows 8 Screensaver/Wallpaper Issues


Sometimes, you might have difficulties enabling or changing the Screen savers and or wallpapers on your Windows 8 PC even if your Windows 8 is activated. Wondering what the problem might be?

Here, we discuss how to correct the problem and solve the issue of your inability to change or enable screensavers and or wallpapers on your Windows 8 PC once and for all.

Causes of the Problem

Actually, you might not be able to change or modify your Windows 8 screensaver or wallpaper if the Windows 8 is not activated, this is because some rights may have been denied.

If your Windows 8 is activated and yet, you are unable to modify or change either the wallpaper or screensaver, then your Windows 8 is probably not well configured during the activation.

Solution

The only known solution still remains the same. Just find another Windows 8 PC activator that can properly configure the PC.

A Google Search for Windows 8 activator can bring you a number of useful results.

Unlike the Windows 7 activator whose download link could be found here, I could not upload the Windows 8 activator. However, the Windows 8 activator is available for sale in the Aryk Enterprise premium software store (Contact Aryk here to purchase).


For any comments or questions over this article please, use the comment box bellow or contact us Via This Link. And if your questions is not about this article and needs our help over something related, Find Us on Facebook. Got any other info you want us discuss? Share it with us using the comment box or contact us!

Outdoor Repairs Done By Aryk

Save your time for other things that mean more to you and focus on organizing all the business appointments you might have!

Either at home or in the office, we can always reach out to you and do all the repairs your phones may ever need anywhere you may be; either in Ilorin or Lagos, Nigeria.


If you have a phone you wish to repair and for one reason or another, you wish to have the phone's problem rectified in your presence; either at the comfort of your home or office, ArykTech is here to do the repairs on the spot.

Let's Here A Bit of the Phone's Issue
1- Emails: aryk.info@gmail.com info@arykblog.com
2- BBM: 768B9576
4- Phone Numbers: 0807 788 8311 0808 599 7677

How to Root Android Devices without PC

Android devices are so enjoyable to use, but it can be even more enjoyable if it is rooted. There are so many ways and methods you can use to gain root privilege on your android devices however, not most methods work without the use of your PC.

Here, we discuss how to root your android devices without the use of your PC. This involves the use of just Baidu Root app.

What is Referred to As Android Root

In case you do not know, Android Root, contains some special folders and files in android systems. Meanwhile, gaining access to the Android Root gives you special privileges and rights to perform certain advanced activities on the phone.

How to Root Android Device without PC Using Baidu Root

Baidu Root is an application that can single-handedly root most android devices and it is downloadable from the Google PlayStore.

Follow the guides below to root your android device without PC but JUST Baidu Root app.
1- Download Baidu Root from the link here. Or, from Google PlayStore.
2- Install the Baidu Root application on your phone.
3- Open the application and click on the "A Key to Get Root Privileges" line.
4- Wait for the application to complete the process and give you the confirmation message.

That simple! Your android device has just been rooted.

NOTE
Please note that you need to download any root manager like the SuperSU or SuperUser from the playstore -this is to help you manage and maintain your root permissions.


For any comments or questions over this article please, use the comment box bellow or contact us Via This Link. And if your questions is not about this article and needs our help over something related, Find Us on Facebook. Got any other info you want us discuss? Share it with us using the comment box or contact us!

How to Remove Pattern Lock On Android Device Without Factory Reset

It has become a common practice to factory reset an android device whenever the phone is locked and the password or pattern lock is forgotten. Meanwhile, to gain access to your android device, even when you have forgotten the security lock; you don't have to factory reset the phone when you can actually remove the pattern lock.
Here, we discuss how to remove the pattern lock on your android device having no need to factory-reset or format the phone.

Requirements

1- A PC, laptop or desktop.
2- ADB Tools -you need to setup ADB (Android Debug Bridge) tools on your PC. For info on how to do that, click here.
3- Android Drivers -android drivers for your particular device has to be installed on the PC. For info on how to download any android drivers, click here.
4- A compatible USB Cable for your android device.

Removing Patter Lock Without Formating your Android Device

In order to remove pattern lock from your android device without actually factory-resetting or formating the phone, you should follow the step by step guides given below;
1- Lunch Command Prompt on your PC and point it to the ADB Tools folder on your PC by typing cd c:/adb-folder-name on the Command Prompt window.
2- On the next line on the Command Prompt Windows, type adb devices -this is to confirm that the PC actually sees your phone in ADB Mode.
3- On the next line type, adb shell.
4- Now type, rm/data/system/gesture.key.

Please note that following each command line you enter above, you need to press the enter button on your PC to excecute the commands and then wait for the next line to appear.

Then, restart your phone and set another security lock on the phone.

WiKi Note
Android Debugging must be enabled on your android device for this to work.


For any comments or questions over this article please, use the comment box bellow or contact us Via This Link. And if your questions is not about this article and needs our help over something related, Find Us on Facebook. Got any other info you want us discuss? Share it with us using the comment box or contact us!

Configure Outlook Account On your Android -How to

Microsoft Outlook is one of the best email services available these days and no doubt, it offers an outstanding security and privacy protection.

Android devices on the other hand, are truly smartphones that do almost everything on their own. However, configuring Microsoft outlook for use with the Android email client could be a little frustrating since the configuration is not automatic.

Here, we discuss how to configure your Microsoft Outlook email services for use with your Android device email client.

Configuring Outlook Email On Android Devices

Although, you can download the Microsoft Outlook Application for your android device from the Google PlayStore. However, for any reason, if you could not use the Outlook Application on your android device; you can follow the step by step guides given below to configure your Outlook Account with your android device email client.

1- Lunch/Open your android device email client.
2- Tap the Menu icon to bring up the settings and tap it.
3- On the upper right-hand corner, tap the "Add Account" icon.
4- On the page that appears next, input your Microsoft Outlook account details. E.g myname@outlook.com and then, your password and tap on Manual Setup.
5- On the next page that appears, choose Exchange.
6- Now, on the Domain/Username field, input your full Microsoft Outlook account name. Input your password and on the Sever field, input s.outlook.com.
Also, check the Use secure connection (SSL) before you tap on the Next option.
7- Wait few minutes for the email client to complete configuring the email then, complete the rest of the process by checking your options and renaming the account.
And so you are done configuring your microsoft Outlook account on your android device.


For any comments or questions over this article please, use the comment box bellow or contact us Via This Link. And if your questions is not about this article and needs our help over something related, Find Us on Facebook. Got any other info you want us discuss? Share it with us using the comment box or contact us!

How to Download Android Drivers for Fairly All Android Devices

To connect your android devices to your Windows PC for engineering purposes, you need to have the android drivers for the particular phone installed on the PC meanwhile; not all android devices drivers are available for download on the internet.

How can you download android drivers then? Here we discuss how to download android drivers for fairly all kinds of android devices.

How to Download Android Drivers Using Mobogenie

Mobogenie for Windows PC is a program designed purposely for android devices and can be used to fulfill many activities on your android devices.

With Mobogenie for Windows PC, you can be able to download android drivers for most android devices and here is how to do it;
1- First, download and install Mobogenie for Windows PC from the link here.
2- Enable USB Debugging on the phone for which you wish to download the android drivers.
3- Connect your Windows PC to the internet.
4- Using a compatible USB Cable, connect your phone to the PC.
5- Wait few seconds for Mobogenie to lunch itself otherwise, lunch/open Mobogenie. On lunch, Mobogenie would attempt to download and install all the necessary drivers for the phone on the PC.

Once Mobogenie is installed and successfully connects to the phone,all the android drivers for that phone are installed, both fastboot and ADB drivers for that device are installed and ready for use.


For any comments or questions over this article please, use the comment box bellow or contact us Via This Link. And if your questions is not about this article and needs our help over something related, Find Us on Facebook. Got any other info you want us discuss? Share it with us using the comment box or contact us!

2 Days Free Training to Make You Mobile Phone Software Engineer

Following the announcement of the Mobile Phone Software Engineer Seminar And Expo (Mobile Phone SESE) by Aryk Enterprises scheduled for the 27th and 28th of December, 2014 (this year), lots of messages have been received requesting for the adjustment in the date (draw closer) of the Seminar and Expo.

But, instead of generally drawing back the date of the Seminar, few people have asked to have their own training earlier than scheduled and to which we have agreed and the training date is the 27th and 28th of September, 2014 (this year) at Cele Express, Lagos State.

What You Will Learn In the Training

This is a 2 Days training that will take you through step by step practicals on how to handle all software related problems of all;
1- Android Devices: this includes all China and France MTK androids like iTel, Tecno, Infinix, Oppsson and all other android devices like HTC, Sony, Samsung amongst others.

Also, besides solving all the software related problems, you will also learn how to upgrade, downgrade, preserve, flash and unbrick all kinds of android devices.

2- BlackBerry Devices: in this training, you will also learn how to correct all software related problems of BlackBerry devices including the recent BlackBerry 10 series.

3- Nokia Devices: all Nokia smartphones are also included in this trainig as you will be taken through all the software related problems of the Nokia devices and how to correct them.

4- iPhones and iPads: lastly, this training will take you through step by step practicals how to upgrade and/or downgrade iPhones.

Also, you will learn how to remove iCloud on iPhones and still have its GSM network working (**iPhone 4 Downward). You can bring an iPhone with you to the training ground (for Live Practicals).

You can secure your seat and join us in the training.

To secure your seat and be part of this training, simply use any of the contacts below to Contact Aryk Enterprise.

Aryk Enterprise Contact Details
1- Emails: aryk.info@gmail.com info@arykblog.com
2- BBM: 768B9576
4- Phone Number: 0807 788 8311 0808 599 7677

Packages Available After the Training

By attending the training, you will receive all the tools needed to startup as a mobile phone software engineer which includes the followings;
1- All the Tools for Flashing android devices including other tools for correcting all other software related problems of android devices.
2- All Nokia tools including flash files downloader, Nokia flashing programs amongst others.
3- All BlackBerry Tools that can be used to flash, upgrade, downgrade and wipe all Blackberry devices.
4- iOS Tools. All iPhones and iPads tools but not including all the firmwares.

BONUS Packages:
You are also entitled to receive this bonus packages that day;

1- Linux OS -this is the best OS for servicing and repairing android devices so far. With this OS, you do not need android drivers before you can be able to repair any android devices.

2- User Guide eBOOK -this user guide eBOOK is like a master that can remain with you forever. This eBOOK contains all that you will be taught that day and you can always read the eBOOK over and over again on your own.

Participation Cost

N5,500 ONLY.

To participate in this training and receive all the packages you need to startup immediately as a mobile phone software engineer, you need to pay just N5,500.

Aryk Bank Details
Bank Name: Account Number: Account Name:
UBA Bank 2040171348 Arewa S O
EcoBank 1081048274 Arewa S O


Please, contact Aryk Enterprise using any of the contact details given above before or after you have made the payment into any of the Bank details given above.

NOTICE:

If you wish to be part of the training but, for one reason or another, you cannot come, you can also request for the Training Kits and learn via the eBOOK on your own.

COST: N4,000 ONLY.

The training kits would be sent to you via a garage to your destination/area where you reside.

Use Command Prompt to Install Applications On Android Devices

Windows Command Prompt and Linux Terminal are very useful tools for servicing android devices on our PCs. But in this article, we would be discussing Windows Command Prompt basically.

In this article, we would discuss how to install applications on your android devices using Windows Command Prompt.


Requirments

1- A Windows PC.
2- ADB Tools -for detailed info about ADB and to set it up on your PC, Click Here.
3- Compatible USB for your phone.
4- Android Drivers for the Phone -for info on how to get android drivers, Click Here.

Installing Applications On Android Device Using Command Prompt

Once you have gotten all the requirments above ready on your PC, simply follow the instructions below to install any application on your android device from Command Prompt.

1- Enable USB Debugging option on the phoe.
2- Connect the phone to the PC using its compatible USB Cable and make sure that the PC actually connects to the phone.
3- Lunch Command Prompt on the PC. On Windows 7, click the start button and type cmd then, enter.
4- On the Command Prompt window, navigate to the ADB Tools folder by typing cd c:/the-ADBTools-folder-name, e.g cd c:/adb and press enter.5- Now, to make it easier, you need to move the .apk files of the applications you wish to install onto the ADB Tools folder.
6- Now, type adb install the-app-name.apk e.g adb install ghostrider.apk on command prompt and press enter.
Now, wait few seconds for the installation to complete.

NOTE:
If the application is already installed and you wish to update it, simply type adb install -r ghostrider.apk and press enter.


For any comments or questions over this article please, use the comment box bellow or contact us Via This Link. And if your questions is not about this article and needs our help over something related, Find Us on Facebook. Got any other info you want us discuss? Share it with us using the comment box or contact us!

How to Solve Appworld Connection Problem On BlackBerry

Blackberry Appworld is a built-in application that comes with all Blackberry smartphones and its sole purpose is to helping you download applications for your Blackberry device faster.

However, sometimes, Blackberry Appworld may fail to connect to the internet or fail to use the BIS connections on your Blackberry device. In such cases, within this page, we narrate the simplest method to correct the error and revive the Blackberry Appworld.


Blackberry Appworld is one of the many applications that makes the experience with Blackberry smartphones a beautiful one for most Blackberry users. This is simply because the Blackberry Appworld takes you closer to all the applications you will ever need for your Blackberry device!

In the other words, without the Blackberry Appworld on your Blackberry device, you would be able to download applications on your Blackberry device, but the download experience would not be so friendly.

Solutions to Blackberry Appworld Connectivity Failure

To this kind of problem with the Blackberry Appworld, there is ONLY one solution and it is;
Un-install and re-install the Blackberry Appworld.


Once Blackberry Appworld begins displaying any of these messages;
1- Blackberry Appworld cannot connect to the Blackberry server, please check your connection settings.
2- Blackberry Appworld: error connecting to the Blackberry Appworld server.
Even when other apps like the BBM and Blackberry Browser connect to the internet, your solution is to uninstall the Blackberry Appworld from the phone and re-install it by downloading another one using the Blackberry inbuilt browser.

Downloading Appworld With the Blackberry Browser

To download another Blackberry Appworld on the phone, simply search "Blackberry Appworld" from Google using the inbuilt browser. The first two results Google displays takes you to the appworld download link. Follow the instructions on the page to download the Appworld, restart your phone as soon as the installation is complete; then enjoy!


For any comments or questions over this article please, use the comment box bellow or contact us Via This Link. And if your questions is not about this article and needs our help over something related, Find Us on Facebook. Got any other info you want us discuss? Share it with us using the comment box or contact us!