Introducing Google Fiber: The Next Chapter of the Internet
Google Fiber starts with Internet speeds 100 times faster than what most Americans have today. In this video, we see the evolution of the Internet represented in three different stages. It started with Dial-Up, grew with Broadband -- and with Google Fiber, the possibilities are endless. Pre-register now at http://www.google.com/fiber
About the Video:
The cars and model installation were built by hand, and filmed at Agua Dolce airport in Santa Clarita, CA. The installation now resides in the Fiber Space in Kansas City. For more info about the Fiber Space, please visit http://google.com/fiber/fiberspace
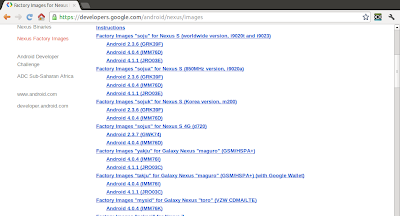
Factory images of Jelly Bean for Galaxy Nexus and Nexus S released
Factory Images for Nexus Devices updated with Factory images of Jelly Bean for Galaxy Nexus and Nexus S.
You will find these files useful if you have used the Android Open-Source Project, flashed custom builds on your device, and wish to return that device to its factory state.
You will find these files useful if you have used the Android Open-Source Project, flashed custom builds on your device, and wish to return that device to its factory state.
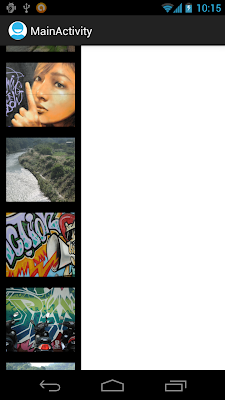
Gallery-like single column GridView
by changing android:numColumns="1", the last exercise of "GridView" can be modified to a Gallery-like single column GridView.
<LinearLayout xmlns:android="http://schemas.android.com/apk/res/android"
    xmlns:tools="http://schemas.android.com/tools"
    android:layout_width="match_parent"
    android:layout_height="match_parent"
    android:orientation="horizontal">
    <GridView
        android:id="@+id/gridview"
        android:layout_width="130dp"
        android:layout_height="fill_parent"
        android:columnWidth="90dp"
        android:numColumns="1"
        android:verticalSpacing="10dp"
        android:horizontalSpacing="10dp"
        android:stretchMode="columnWidth"
        android:gravity="center"
        android:background="@android:color/background_dark"/>
    <LinearLayout
        android:layout_width="match_parent"
        android:layout_height="match_parent"
        android:orientation="vertical"
        android:background="@android:color/background_light">
 </LinearLayout>
</LinearLayout>
Vertical Gallery-like ScrollView
With the custom LinearLayout (MyHorizontalLayout.java) in last exercise "Implement custom LinearLayout for Gallery-like HorizontalScrollView", it can be implement vertical Gallery-like ScrollView also.
Keep both MainActivity.java and MyHorizontalLayout.java of last exercise no change.
Modify the layout.
Related:
- GridView loading photos from SD Card
Keep both MainActivity.java and MyHorizontalLayout.java of last exercise no change.
Modify the layout.
<LinearLayout xmlns:android="http://schemas.android.com/apk/res/android"
    xmlns:tools="http://schemas.android.com/tools"
    android:layout_width="match_parent"
    android:layout_height="match_parent"
    android:orientation="vertical">

    <ScrollView
        android:layout_width="wrap_content"
        android:layout_height="fill_parent" >
        <com.example.androidhorizontalscrollviewgallery.MyHorizontalLayout
            android:id="@+id/mygallery"
            android:layout_width="wrap_content"
            android:layout_height="wrap_content"
            android:orientation="vertical"
            />
    </ScrollView>

</LinearLayout>
Related:
- GridView loading photos from SD Card
Android SDK Tools Revision 20.0.1, NDK revision 8b, and ADT 20.0.1 released
Android SDK Tools Revision 20.0.1, full SDK for Android 4.1, released. You can now develop and publish applications against API level 16 using new Jelly Bean APIs. The new update can be downloaded through SDK Manager. Also updated are NDK revision 8b and ADT Plugin 20.0.1.
Update SDK on Eclipse:
Please note that note that the SDK Tools r20.0.1 is designed for use with ADT 20.0.1 and later. To update ADT in Eclipse, click Help -> Check for updates, to update ADT.
After updated ADT, click Window -> Android SDK Manager to install updated components.
Update SDK on Eclipse:
Please note that note that the SDK Tools r20.0.1 is designed for use with ADT 20.0.1 and later. To update ADT in Eclipse, click Help -> Check for updates, to update ADT.
After updated ADT, click Window -> Android SDK Manager to install updated components.
Error of getLocationInWindow() and getLocationOnScreen()
The View class provide the methods to computes the coordinates:
In my experience, the returned x location is correct, but the y location is always error with a fixed offset. The offset various depends on devices and configuration.
To correct it, we can get the offset using the code, after view displayed:
DisplayMetrics displayMetrics = new DisplayMetrics();
getWindowManager().getDefaultDisplay().getMetrics(displayMetrics);
int offsetY = displayMetrics.heightPixels - mainScreen.getMeasuredHeight();
- getLocationInWindow (int[] location): Computes the coordinates of the view in its window.
- getLocationOnScreen (int[] location): Computes the coordinates of the view on the screen.
In my experience, the returned x location is correct, but the y location is always error with a fixed offset. The offset various depends on devices and configuration.
To correct it, we can get the offset using the code, after view displayed:
DisplayMetrics displayMetrics = new DisplayMetrics();
getWindowManager().getDefaultDisplay().getMetrics(displayMetrics);
int offsetY = displayMetrics.heightPixels - mainScreen.getMeasuredHeight();
package com.example.androidoffsetgetlocation;

import android.os.Bundle;
import android.app.Activity;
import android.util.DisplayMetrics;
import android.widget.ImageView;
import android.widget.LinearLayout;
import android.widget.TextView;

public class MainActivity extends Activity {

 LinearLayout mainScreen;
 ImageView object;
 TextView textOnCreate, textOnWindowFocusChanged;

    @Override
    public void onCreate(Bundle savedInstanceState) {
        super.onCreate(savedInstanceState);
        setContentView(R.layout.activity_main);

        mainScreen = (LinearLayout)findViewById(R.id.mainscreen);
        object = (ImageView)findViewById(R.id.object);
        textOnCreate = (TextView)findViewById(R.id.textview1);
        textOnWindowFocusChanged = (TextView)findViewById(R.id.textview2);

  readLocation(textOnCreate, "onCreate()");
    }

 @Override
 public void onWindowFocusChanged(boolean hasFocus) {
  // TODO Auto-generated method stub
  super.onWindowFocusChanged(hasFocus);

  readLocation(textOnWindowFocusChanged, "onWindowFocusChanged()");
 }

 private void readLocation(TextView tv, String status){
  DisplayMetrics displayMetrics = new DisplayMetrics();
  getWindowManager().getDefaultDisplay().getMetrics(displayMetrics);
  int offsetX = displayMetrics.widthPixels - mainScreen.getMeasuredWidth();
  int offsetY = displayMetrics.heightPixels - mainScreen.getMeasuredHeight();

        int[] locationInWindow = new int[2];
  object.getLocationInWindow(locationInWindow);
  int[] locationOnScreen = new int[2];
  object.getLocationOnScreen(locationOnScreen);

  tv.setText(
    "\n" + status +"\n"
    + "getLocationInWindow() - " + locationInWindow[0] + " : " + locationInWindow[1] + "\n"
    + "getLocationOnScreen() - " + locationOnScreen[0] + " : " + locationOnScreen[1] + "\n"
    + "Offset x: y - " + offsetX + " : " + offsetY);

 }

}
<LinearLayout xmlns:android="http://schemas.android.com/apk/res/android"
    xmlns:tools="http://schemas.android.com/tools"
    android:layout_width="match_parent"
    android:layout_height="match_parent"
    android:orientation="vertical"
    android:id="@+id/mainscreen">

    <ImageView
        android:id="@+id/object"
        android:layout_width="wrap_content"
        android:layout_height="wrap_content"
        android:src="@drawable/ic_launcher"/>
    <TextView
        android:id="@+id/textview1"
        android:layout_width="wrap_content"
        android:layout_height="wrap_content"/>
    <TextView
        android:id="@+id/textview2"
        android:layout_width="wrap_content"
        android:layout_height="wrap_content"/>

</LinearLayout>
Complete list of all new features of Android 4.1 Jelly Bean
Android 4.1, Jelly Bean, is the fastest and smoothest version of Android yet. Jelly Bean improves on the simplicity and beauty of Android 4.0, and introduces a new Google search experience on Android.
To read what's new in Android 4.1 Jelly Bean, visit: http://www.android.com/about/jelly-bean/.
- Everything in Jelly Bean feels fast, fluid, and smooth. Moving between home screens and switching between apps is effortless, like turning pages in a book.
- Jelly Bean features improved performance throughout the system, including faster orientation changes, faster responses when switching between recent apps, and smoother and more consistent rendering across the system through vsync and triple buffering.
- Jelly Bean has more reactive and uniform touch responses, and makes your device even more responsive by boosting your device's CPU instantly when you touch the screen, and turns it down when you don't need it to improve battery life.
To read what's new in Android 4.1 Jelly Bean, visit: http://www.android.com/about/jelly-bean/.
Implement grouped CheckBox on Action Menu
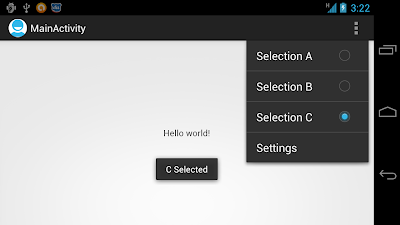
Example of Action Menu with grouped CheckBox.
Create /res/menu/activity_main.xml to define action menu.
The checked status will not be updated automatically. We can change it in onOptionsItemSelected() callback method.
Create /res/menu/activity_main.xml to define action menu.
<menu xmlns:android="http://schemas.android.com/apk/res/android">
    <item android:id="@+id/menu_settings"
        android:title="@string/menu_settings"
        android:orderInCategory="100"
        android:showAsAction="never" />
    <group android:checkableBehavior="single">
        <item android:id="@+id/selecta"
              android:title="Selection A" android:checked="true"/>
        <item android:id="@+id/selectb"
              android:title="Selection B" />
        <item android:id="@+id/selectc"
              android:title="Selection C" />
    </group>
</menu>
The checked status will not be updated automatically. We can change it in onOptionsItemSelected() callback method.
package com.example.androidactionbar;

import android.os.Bundle;
import android.app.Activity;
import android.view.Menu;
import android.view.MenuItem;
import android.widget.Toast;

public class MainActivity extends Activity {

    @Override
    public void onCreate(Bundle savedInstanceState) {
        super.onCreate(savedInstanceState);
        setContentView(R.layout.activity_main);
    }

    @Override
    public boolean onCreateOptionsMenu(Menu menu) {
        getMenuInflater().inflate(R.menu.activity_main, menu);
        return true;
    }

 @Override
 public boolean onOptionsItemSelected(MenuItem item) {
  switch (item.getItemId()) {
        case R.id.selecta:
         item.setChecked(true);
         Toast.makeText(getApplicationContext(),
           "A Selected",
           Toast.LENGTH_LONG).show();
         return true;
        case R.id.selectb:
         item.setChecked(true);
         Toast.makeText(getApplicationContext(),
           "B Selected",
           Toast.LENGTH_LONG).show();
         return true;
        case R.id.selectc:
         item.setChecked(true);
         Toast.makeText(getApplicationContext(),
           "C Selected",
           Toast.LENGTH_LONG).show();
         return true;
        default:
            return super.onOptionsItemSelected(item);
  }
 }

}
Nedd for speed hot pursuit
Um dos melhores jogos de corrida de todos!!! Vale muito a pena baixar esse jogo.
Repleto de missões e objetivos, bem completo esse jogo.
APK :http://www.4shared.com/android/oXrco9-7/needforspeed-androidxz.html
testado no samsung galaxy s2 lite
Android Accessory Development Kit (ADK) for 2012
The Android Accessory Development Kit (ADK) for 2012 is the latest reference implementation of an Android Open Accessory device, designed to help Android hardware accessory builders and software developers create accessories for Android.
Google I/O 2012 - ADK 2.0
Introducing the new APIs and capabilities in ADK 2.0, with demos.
The ADK 2012 is based on the Arduino open source electronics prototyping platform and is an open hardware design. The hardware design files and firmware source code are included with the ADK software download. The ADK contains two main physical hardware components:
- Main processing board containing the microprocessor, USB connections, power connector and input/output pins. This board can be removed and used separately from the rest of the hardware.
- Shield containing sensors, LEDs, input controls, audio amplifier and speaker output, contained in a custom, polygon box enclosure.
The main hardware features of the ADK are as follows:
- An ARM 32-bit Cortex M3 micro-processor
- Separate USB connections for an Android device and computer connection for programming and debugging
- Sensors for light, color, proximity, temperature, humidity, barometric pressure, and acceleration
- Micro SD Card slot
- Bluetooth support
The ADK comes preloaded with an alarm clock firmware program that you can use immediately. A companion Android application, ADK 2012, is available on Google Play. The source code for both the Android application and the ADK firmware (an Arduino sketch) can be downloaded from this page.
The ADK 2012 also comes with additional parts to help you develop accessories with it, including:
- AC power adapter
- USB A to Micro USB B connector cable
- Micro USB B to Micro USB AB connector (small, rectangular plug)
- Micro SD Card, preinstalled in the ADK SD Card socket
Google I/O 2012 - ADK 2.0
Introducing the new APIs and capabilities in ADK 2.0, with demos.
Acesso root no seu Android - pedido
O QUE É, E PARA QUE SERVE O ROOT?
Descrição:
O root, ou superusuário, no sistema Linux, é o usuário que tem permisão total sobre o mesmo.No caso do androis, ''fazer'ó root é como desbloquear o sistema, dando ao usuário a permissão de acessar e modificar arquivos, pastas, configurações, enfim tudo em relação ao Android.Isso possibilita desde a desinstalação de programas inúteis do sistema até a troca do firmaware original, overclock e etc.
Sim.Mesmo você tendo compado seu telefone vc aceita os termos de ultilidades do sistema operacional o android junto ao telefone que possui proteção sore modificaçãoes e afins.
OK.QUERO FAZER ASSIM MESMO.MAS DÁ PRA REVERTER?
Sim.O processo de root é totalmente reversível.Algumas modificações feitas com esse privilégio é que podem não ser.
FIZ O ROOT E AGORA POSSO SAIR FUÇANDO QUE NEM LOUCO?
Poder até pode, mas não é recomendavel.A não ser que vc tenha conhecimento do que vc está fazendo alguns procedimento podem matar o telefone ou trava-lo em firmwares não oficiais.
COMO LIBERAR O ROOT
PROGRAMAS NECESSÁRIOS:
SuperOneClick(use a vesão 1.7 para ECLAIR e 1.9.5 para FROYO e GINGERBREAD)
Kies(para instalar os drives adicionais da Samsung necessários para o computador reconhecer o aparelho)
Dowlload: site oficial da Samsung
1.Baixe o Kies e instale, baixe também o SuperOneClick e descompacte;
2.No celular vá em Menu>Configurações>Desenvolvimento e ative a Depuração de USB;
3.Conecte o celular no usb (se é primeira vez espere detectar os drives);
4.Abra o SuperOneClick com permisões de admistrador(Botão direito do mouse/Executar como Administrador);
5.Cliqie em SHELL ROOT, assim que o processo termina clique em ROOT;
6.Caso pergunte se eu Android é 2.0 superior, aperte YES.Faça o mesmo para a instalação da BusyBox e o teste final.
7.Espere até aparecer a caixa de diálogo dizando ''you phone is rooted''e clique em ok.
8.Desconecte o telefone do computador, desative a função de Depuração e reinicie o celular.
Para quem teve o problema de o SuperOneClick travar no ''Waiting Device...''desative as conexões de dados em Configurações>gerenciador de dados>entrega de dados, desative dados em segundo plano e dados ativados, antes de todo o processo.
Para quem teve o problema ''Geting mount path... rootfs/ rootfs ro 00 FAILED'', tente outra versão do SuperOneClik.
OBS:MODIFICAÇÕES DESSE PORTE NÃO SÃO BRINCADEIRA E PODEM DANIICAR PERMANENTEMENTE O APARELHO.SEMPRE BUSQUE INFORMAÇÕES ANTES DE QUALQUER MUDANÇA DESSE TIPO.FAÇA POR SUA CONTA E RISCO.NIGUÉM DO BLOG SE RESPONSABILIZA PELOS SUES ATOS.
Enable Hardware Acceleration using Java code
To enable Hardware Acceleration programmatically using Java code, call the following code with FLAG_HARDWARE_ACCELERATED:
getWindow().setFlags(WindowManager.LayoutParams.FLAG_HARDWARE_ACCELERATED, WindowManager.LayoutParams.FLAG_HARDWARE_ACCELERATED);
The flag FLAG_HARDWARE_ACCELERATED indicates whether this window should be hardware accelerated. Requesting hardware acceleration does not guarantee it will happen.
It is important to remember that this flag must be set before setting the content view of your activity or dialog.
This flag cannot be used to disable hardware acceleration after it was enabled in your manifest using hardwareAccelerated (refer Enable Hardware Acceleration for Android 3.0 or later devices). If you need to selectively and programmatically disable hardware acceleration (for automated testing for instance), make sure it is turned off in your manifest and enable it on your activity or dialog when you need it instead, using the method described above.
Related:
- Enable Hardware Acceleration for Android 3.0 or later devices
getWindow().setFlags(WindowManager.LayoutParams.FLAG_HARDWARE_ACCELERATED, WindowManager.LayoutParams.FLAG_HARDWARE_ACCELERATED);
The flag FLAG_HARDWARE_ACCELERATED indicates whether this window should be hardware accelerated. Requesting hardware acceleration does not guarantee it will happen.
It is important to remember that this flag must be set before setting the content view of your activity or dialog.
This flag cannot be used to disable hardware acceleration after it was enabled in your manifest using hardwareAccelerated (refer Enable Hardware Acceleration for Android 3.0 or later devices). If you need to selectively and programmatically disable hardware acceleration (for automated testing for instance), make sure it is turned off in your manifest and enable it on your activity or dialog when you need it instead, using the method described above.
package com.example.androidhardwareacceleration;

import android.os.Bundle;
import android.app.Activity;
import android.view.View;
import android.view.View.OnClickListener;
import android.view.WindowManager;
import android.widget.ImageView;
import android.widget.TextView;

public class MainActivity extends Activity {

 TextView hw;
 ImageView imageView;

    @Override
    public void onCreate(Bundle savedInstanceState) {
        super.onCreate(savedInstanceState);

        getWindow().setFlags(WindowManager.LayoutParams.FLAG_HARDWARE_ACCELERATED,
          WindowManager.LayoutParams.FLAG_HARDWARE_ACCELERATED);

        setContentView(R.layout.activity_main);

        imageView = (ImageView)findViewById(R.id.iv);
        hw = (TextView)findViewById(R.id.hw);

        imageView.setImageResource(R.drawable.ic_launcher);

        imageView.setOnClickListener(new OnClickListener(){

   @Override
   public void onClick(View arg0) {
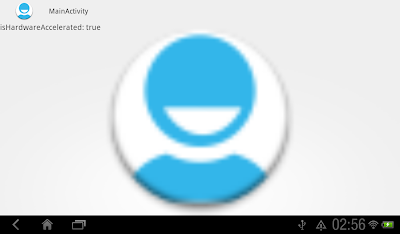
    boolean isHWAccelerated = imageView.isHardwareAccelerated();
          hw.setText("isHardwareAccelerated: " + String.valueOf(isHWAccelerated));

   }});

    }

}
<RelativeLayout xmlns:android="http://schemas.android.com/apk/res/android"
    xmlns:tools="http://schemas.android.com/tools"
    android:layout_width="match_parent"
    android:layout_height="match_parent">

    <ImageView
        android:id="@+id/iv"
        android:layout_width="match_parent"
        android:layout_height="match_parent" />
    <TextView
        android:id="@+id/hw"
        android:layout_width="match_parent"
        android:layout_height="wrap_content"
        android:textSize="20sp"
        android:text="Touch the big icon to check isHardwareAccelerated"/>

</RelativeLayout>
Related:
- Enable Hardware Acceleration for Android 3.0 or later devices
Enable Hardware Acceleration for Android 3.0 or later devices
Android 3.0 (Honeycomb) introduced Hardware Acceleration. To enable Hardware Acceleration for your app, edit AndroidManifest.xml to insert the attribute android:hardwareAccelerated="true" in <application /> tag.
To check if any view/canvas is hardware accelerated, simple call:
- View.isHardwareAccelerated(), or
- Canvas.isHardwareAccelerated()
Related:
- Enable Hardware Acceleration using Java code
To check if any view/canvas is hardware accelerated, simple call:
- View.isHardwareAccelerated(), or
- Canvas.isHardwareAccelerated()
<manifest xmlns:android="http://schemas.android.com/apk/res/android"
    package="com.example.androidhardwareacceleration"
    android:versionCode="1"
    android:versionName="1.0" >

    <uses-sdk
        android:minSdkVersion="11"
        android:targetSdkVersion="15" />

    <application
        android:icon="@drawable/ic_launcher"
        android:label="@string/app_name"
        android:theme="@style/AppTheme"
        android:hardwareAccelerated="true">
        <activity
            android:name=".MainActivity"
            android:label="@string/title_activity_main" >
            <intent-filter>
                <action android:name="android.intent.action.MAIN" />

                <category android:name="android.intent.category.LAUNCHER" />
            </intent-filter>
        </activity>
    </application>

</manifest>
<RelativeLayout xmlns:android="http://schemas.android.com/apk/res/android"
    xmlns:tools="http://schemas.android.com/tools"
    android:layout_width="match_parent"
    android:layout_height="match_parent">

    <ImageView
        android:id="@+id/iv"
        android:layout_width="match_parent"
        android:layout_height="match_parent"
        />
    <TextView
        android:id="@+id/hw"
        android:layout_width="match_parent"
        android:layout_height="wrap_content"
        android:textSize="20sp"
        android:text="Touch the big icon to check isHardwareAccelerated"/>

</RelativeLayout>
package com.example.androidhardwareacceleration;

import android.os.Bundle;
import android.app.Activity;
import android.view.View;
import android.view.View.OnClickListener;
import android.widget.ImageView;
import android.widget.TextView;

public class MainActivity extends Activity {

 TextView hw;
 ImageView imageView;

    @Override
    public void onCreate(Bundle savedInstanceState) {
        super.onCreate(savedInstanceState);
        setContentView(R.layout.activity_main);

        imageView = (ImageView)findViewById(R.id.iv);
        hw = (TextView)findViewById(R.id.hw);

        imageView.setImageResource(R.drawable.ic_launcher);

        imageView.setOnClickListener(new OnClickListener(){

   @Override
   public void onClick(View arg0) {
    boolean isHWAccelerated = imageView.isHardwareAccelerated();
          hw.setText("isHardwareAccelerated: " + String.valueOf(isHWAccelerated));

   }});

    }

}
Related:
- Enable Hardware Acceleration using Java code
Pre-announce - New YouTube Android Player Tools@Google I/O 2012
If you are building Android smartphone, tablet or Google TV applications and want to incorporate high-quality YouTube video playback in your product this session will rock your world.
Android Apps in Google Play - Google I/O 2012
Google Play is growing faster than ever. In this talk, we'll share insights about Google Play's momentum, the most successful Google Play apps, and some new developments coming soon from Google Play. We'll also share new publisher-facing features that will help Android app developers get the most as they run their day-to-day businesses in Google Play.
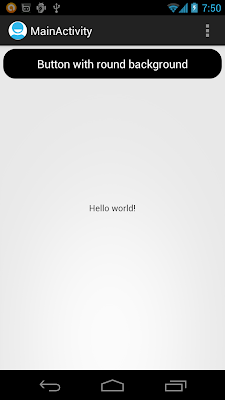
Create button with round background
To create button with round background, create /res/drawable/roundbackground.xml to define round background drawable.
Apply "roundbackground" to the background of button.
<?xml version="1.0" encoding="utf-8"?>
<shape xmlns:android="http://schemas.android.com/apk/res/android"
    android:shape="rectangle"
    android:padding="10dp">
    <solid android:color="@android:color/background_dark"/>
    <corners
        android:bottomRightRadius="20dp"
        android:bottomLeftRadius="20dp"
        android:topLeftRadius="20dp"
        android:topRightRadius="20dp"/>
</shape>
Apply "roundbackground" to the background of button.
<RelativeLayout xmlns:android="http://schemas.android.com/apk/res/android"
    xmlns:tools="http://schemas.android.com/tools"
    android:layout_width="match_parent"
    android:layout_height="match_parent" >

    <TextView
        android:layout_width="wrap_content"
        android:layout_height="wrap_content"
        android:layout_centerHorizontal="true"
        android:layout_centerVertical="true"
        android:padding="@dimen/padding_medium"
        android:text="@string/hello_world"
        tools:context=".MainActivity" />
    <Button
        android:layout_width="match_parent"
        android:layout_height="wrap_content"
        android:layout_margin="5dp"
        android:background="@drawable/roundbackground"
        android:text="Button with round background"
        android:textColor="@android:color/white"
        />

</RelativeLayout>
Creating alias resources
When you have a resource that you'd like to use for more than one device configuration (but do not want to provide as a default resource), you do not need to put the same resource in more than one alternative resource directory. Instead, you can (in some cases) create an alternative resource that acts as an alias for a resource saved in your default resource directory.
Reference: http://developer.android.com/guide/topics/resources/providing-resources.html#AliasResources
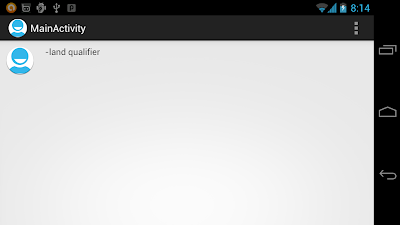
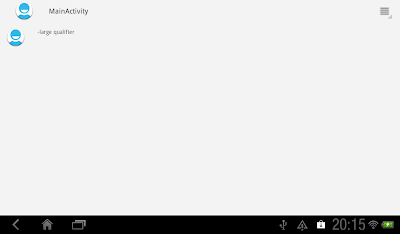
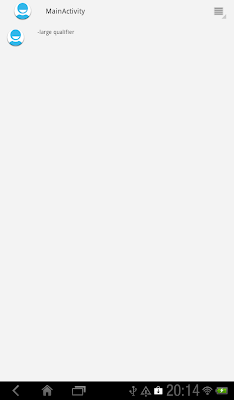
Refer to the last exercise of Alternative Resources. Both /res/layout-land/activity_main.xml and /res/layout-large/activity_main.xml have the same layout. We can create alias resources refer to a common xml file.
Create: /res/values-land/refs.xml and /res/values-large/refs.xml.
Both define resource of type="layout" with name="activity_item_list", refer to the same layout file /res/layout/activity_main_horizontal.xml
Create the common layout /res/layout/activity_main_horizontal.xml. Actually it's the original /res/layout-land/activity_main.xml and /res/layout-large/activity_main.xml.
Delete the original duplicated layout, /res/layout-land/activity_main.xml and /res/layout-large/activity_main.xml.
It have the same result of the last exercise, Providing Alternative Resources.
Reference: http://developer.android.com/guide/topics/resources/providing-resources.html#AliasResources
Refer to the last exercise of Alternative Resources. Both /res/layout-land/activity_main.xml and /res/layout-large/activity_main.xml have the same layout. We can create alias resources refer to a common xml file.
Create: /res/values-land/refs.xml and /res/values-large/refs.xml.
Both define resource of type="layout" with name="activity_item_list", refer to the same layout file /res/layout/activity_main_horizontal.xml
<resources>
    <item type="layout" name="activity_main">@layout/activity_main_horizontal</item>
</resources>
Create the common layout /res/layout/activity_main_horizontal.xml. Actually it's the original /res/layout-land/activity_main.xml and /res/layout-large/activity_main.xml.
<RelativeLayout xmlns:android="http://schemas.android.com/apk/res/android"
    xmlns:tools="http://schemas.android.com/tools"
    android:layout_width="match_parent"
    android:layout_height="match_parent" >

    <LinearLayout
        android:layout_width="match_parent"
        android:layout_height="match_parent"
        android:orientation="horizontal">
    <ImageView
        android:layout_width="wrap_content"
        android:layout_height="wrap_content"
        android:layout_centerHorizontal="true"
        android:layout_centerVertical="true"
        android:padding="@dimen/padding_medium"
        android:src="@drawable/ic_launcher"
        tools:context=".MainActivity" />
    <TextView
        android:layout_width="wrap_content"
        android:layout_height="wrap_content"
        android:layout_centerHorizontal="true"
        android:layout_centerVertical="true"
        android:padding="@dimen/padding_medium"
        android:text="@string/myqualifier"
        tools:context=".MainActivity" />
    </LinearLayout>

</RelativeLayout>
Delete the original duplicated layout, /res/layout-land/activity_main.xml and /res/layout-large/activity_main.xml.
It have the same result of the last exercise, Providing Alternative Resources.
Providing Alternative Resources
App developers can provide alternative resources to support specific device configurations. For instance, you should include alternative drawable resources for different screen densities and alternative string resources for different languages. At runtime, Android detects the current device configuration and loads the appropriate resources for your application.
Reference: http://developer.android.com/guide/topics/resources/providing-resources.html#AlternativeResources
It's a example to provide alternative resources for various configurations.
Create a Android Application Project with Build SDK Android 4.1 (API 16) and Minimum Required SDK API 11: Android 3.0 (Honeycomb), select BlankActivity, Navigation Type of None.
Modify/Create resources as list below:
/res/values/strings.xml
/res/values-land/strings.xml
/res/values-large/strings.xml
/res/values-v11/strings.xml
/res/values-v14/strings.xml
/res/layout/activity_main.xml, LinearLayout in vertical.
/res/layout-land/activity_main.xml
/res/layout-large/activity_main.xml, LinearLayout in horizontal.
In this exercise both /res/layout-land/activity_main.xml and /res/layout-large/activity_main.xml have the same layout. It can defined in one common layout file with alias resources.
Reference: http://developer.android.com/guide/topics/resources/providing-resources.html#AlternativeResources
It's a example to provide alternative resources for various configurations.
Create a Android Application Project with Build SDK Android 4.1 (API 16) and Minimum Required SDK API 11: Android 3.0 (Honeycomb), select BlankActivity, Navigation Type of None.
Modify/Create resources as list below:
/res/values/strings.xml
<resources>

    <string name="app_name">AndroidQualifier</string>
    <string name="hello_world">Hello world!</string>
    <string name="menu_settings">Settings</string>
    <string name="title_activity_main">MainActivity</string>

    <string name="myqualifier">DEFAULT qualifier</string>

</resources>
/res/values-land/strings.xml
<resources>
    <string name="myqualifier">-land qualifier</string>
</resources>
/res/values-large/strings.xml
<resources>
    <string name="myqualifier">-large qualifier</string>
</resources>
/res/values-v11/strings.xml
<resources>
    <string name="myqualifier">-v11 qualifier</string>
</resources>
/res/values-v14/strings.xml
<resources>
    <string name="myqualifier">-v14 qualifier</string>
</resources>
/res/layout/activity_main.xml, LinearLayout in vertical.
<RelativeLayout xmlns:android="http://schemas.android.com/apk/res/android"
    xmlns:tools="http://schemas.android.com/tools"
    android:layout_width="match_parent"
    android:layout_height="match_parent" >

    <LinearLayout
        android:layout_width="match_parent"
        android:layout_height="match_parent"
        android:orientation="vertical">
    <ImageView
        android:layout_width="wrap_content"
        android:layout_height="wrap_content"
        android:layout_centerHorizontal="true"
        android:layout_centerVertical="true"
        android:padding="@dimen/padding_medium"
        android:src="@drawable/ic_launcher"
        tools:context=".MainActivity" />
    <TextView
        android:layout_width="wrap_content"
        android:layout_height="wrap_content"
        android:layout_centerHorizontal="true"
        android:layout_centerVertical="true"
        android:padding="@dimen/padding_medium"
        android:text="@string/myqualifier"
        tools:context=".MainActivity" />
    </LinearLayout>

</RelativeLayout>
/res/layout-land/activity_main.xml
/res/layout-large/activity_main.xml, LinearLayout in horizontal.
<RelativeLayout xmlns:android="http://schemas.android.com/apk/res/android"
    xmlns:tools="http://schemas.android.com/tools"
    android:layout_width="match_parent"
    android:layout_height="match_parent" >

    <LinearLayout
        android:layout_width="match_parent"
        android:layout_height="match_parent"
        android:orientation="horizontal">
    <ImageView
        android:layout_width="wrap_content"
        android:layout_height="wrap_content"
        android:layout_centerHorizontal="true"
        android:layout_centerVertical="true"
        android:padding="@dimen/padding_medium"
        android:src="@drawable/ic_launcher"
        tools:context=".MainActivity" />
    <TextView
        android:layout_width="wrap_content"
        android:layout_height="wrap_content"
        android:layout_centerHorizontal="true"
        android:layout_centerVertical="true"
        android:padding="@dimen/padding_medium"
        android:text="@string/myqualifier"
        tools:context=".MainActivity" />
    </LinearLayout>

</RelativeLayout>
In this exercise both /res/layout-land/activity_main.xml and /res/layout-large/activity_main.xml have the same layout. It can defined in one common layout file with alias resources.
10.9% of Android devices running Ice Cream Sandwich
According to the updated distribution data from Android Developers Site, there are 10.9% of Android devices running Ice Cream Sandwich (Android 4). To know more, visit: http://developer.android.com/about/dashboards/index.html.
It can be predicted that Ice Cream Sandwich and post-Ice Cream Sandwich devices (that means 'Fragment-ready') will dominate in the coming future.
It can be predicted that Ice Cream Sandwich and post-Ice Cream Sandwich devices (that means 'Fragment-ready') will dominate in the coming future.
Error: The method onItemSelected(String) of type ItemListActivity must override a superclass method
It MAY BE happen if you new a project using the new Android SDK Revision 20: Eclipse complain with errors of:
- The method onItemSelected(String) of type ItemListActivity must override a superclass method
- The method onItemSelected(String) of type new ItemListFragment.Callbacks(){} must override a superclass method
Checking the updated System requirements of Android SDK, only JDK 6 is officially supported:
To fix it: correct Compiler compliance level to 1.6.
- Right click your project, select Properties.
- Select Java Compiler tab, change Compiler compliance level to 1.6.
- Alternatively, you can click Window -> Preferences, then select Java -> Compiler to change Compiler compliance level to 1.6 for the whole workspace.
Then clean and re-build. Now fixed with 0 errors.
Subscribe to:
Comments (Atom)
